Nodeless Bamboo Fly Rods

If anyone is interested there is a listing of a complete rod making "shop" for sale over in Boise Idaho. Pretty much everything you could need for a little over $3K. PM me if you are interested and I'll send you the link to the other site.
 
If anyone is interested there is a listing of a complete rod making "shop" for sale over in Boise Idaho. Pretty much everything you could need for a little over $3K. PM me if you are interested and I'll send you the link to the other site.
Wonder what planing forms they have? Hope it's not someone I know in ID!
 
Very nice and thorough report, Mike
I did note that when using potassium permanganate, it does not stain any enamel left on the cane.

Thanks for helping me understand the splicing process.

After gluing up the spliced splines, I ran them through the Baginski mill to clean up the edges and size them for the planning form. The one thing that I noticed immediately, is that without the nodes, the splines planed like butter. No stalls or chips.

I did stagger the splices but primarily to avoid a potential “picket fence” look. After glue-up though, the splices on the rod are difficult to spot without magnification.

Since this was my first spliced rod – a Bokstrom 8’3” Cutthroat taper – I decided to run an experiment.

I hollowed the rod before glue-up and added intermediate wraps to one of the tip sections. The intermediates consist of 5-wraps of #100 silk evenly spaced between the guides; 35 intermediates in total. The wraps on both tips received two coats of varnish and then the rod sections received two dips in the varnish tank.

The tips weighed exactly the same before wrapping: 18.4 grams which includes the male ferrule and tip top. It took 306.3 grams for both tips to bend to a 30” arc from horizontal.

In the end, the tip with the intermediate wraps weighed only 0.2 grams more than the one with just guide wraps. I honestly expected it to be heavier. It was also 6% stiffer – taking nearly 325 grams to bend in the same arc, which was both a surprise and quite apparent.

I haven’t had a chance to cast the rod, but I am curious how all 72 splices in butt and tip sections hold up.

Steve Foisie
 
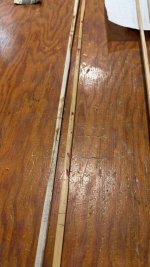
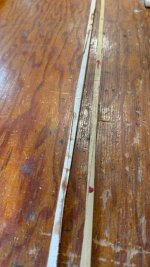
Well, I'm back in town and ready to get back at this nodeless rod I'm making. Right now, I just glued up the last two splices. I'm starting to scrape the enamel surfaces of the strips I have created. I used a homemade scraper that uses a drywall knife blade for this step. Here is a picture of the glued up splices enamel and pith side before being scraped with the scraper block..

Splices.jpg

Splices 2.jpg


After inspecting the splices for flaws or gaps the next step is to "square" up the strips. To do this I hold the strip with the enamel side at a 90 degree angle to the bench and plane the edge to a flat surface. Then rotate the opposite side up and do the same to it. Now the enamel side is semi flat and both edges are flat now also (three sides). Then I flip the strip and plane off the back pit side to finally have a fully squared up strip ready for the roughing form. In the roughing form I will plane one of the side edges to a 60 degree angle relative to the enamel face. Each strip will receive this next step, but only on one edge adjacent to the enamel. After this step is completed I will move to a planing form for the next step. This form has a 60 degree V groove in it. So the side of the strip that was planed to that angle will rest in the form on one side and the enamel on the opposite side of the V. The exposed edge on the top now will be planed parallel to the form surface to create the third 60 degree angle on the last edge.
Now my strips will have the three equal angles on all three corners. I'll set the form to my taper and plane to that measurement. In the pictures below top is the glue up next is the squared up strip, then the rough planed strip and finally a tip strip planed to taper.

glue up II.jpg

f8a928ab-b41d-421b-a35a-edb86d6a6580.jpg


fa205554-02b7-49db-b904-982535db8d1c.jpg


e409ea97-fed8-4492-be94-e087c827e43a.jpg
 
Last edited:
Back
Top