Nodeless Bamboo Fly Rods

Mike Monsos

Life of the Party
Forum Supporter


Why Make a nodeless bamboo flyrod?

​

For me it was time to try something different. After making 30 conventional bamboo fly rods I decided to try making a nodeless fly rod. While doing this I also wanted to make a rod without all the power tools and equipment that I have collected or built over the last 15 years. I also wanted to see what tools the absolute minimum are I feel you need to make a bamboo fly rod.

First thing you need is a culm of bamboo. Cost today is about $60 if you need one shipped to you.

To start off you will want to have a hand saw to cut out each of the nodes in you culm. You will cut one inch on each side of the node. As you cut out the nodes you will mark each “tubes” bottom and relative position in the culm. You want to use the lower half of the culm for your base and the upper half for the tip section. The reason you do this is that the power fibers layer in the lower section are thicker to support the tall height of the bamboo plant.

Now you will have about eight tube sections ready for heat treating. To accomplish this you can use the kitchen range’s oven. Place the tubes on a baking sheet and bake them at 350 degrees for 18 minutes. Heat treating is completed at this point.

Next up is splitting the tubes into sticks that you will use for your splices to create a long strip to make your rod with. The strips will be split to a width of just over ¼” (.300”). I measure and mark the upper end of the tube and use a wire cutter to start the split. The stick will nearly split all the way down the tube a quick twist of a pocketknife in the split will complete the separation. Once the entire tube is split, I bundle all these sticks together and set them aside. The same process is then done for each of the bamboo tubes.

Here is an image of how I mark and identify the relative location of each tube’s bundle of strips. This group is marked one through five by the stripes, one being the lowest of the culms and five being the uppermost of that group. Remember the lower and upper halves of the culm stick bundles are two separate groups at this time.
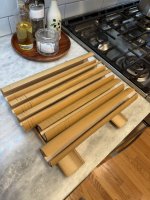
heat treating.jpg

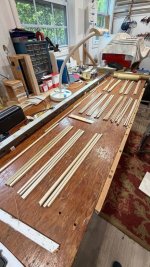
Next we will organize the strips in order into six groups that will each become one long strip to make the bamboo fly rod section.


You can see on the left my planning form and four sticks lined up with overlap to allow for the splice from the bundle collections to the right. You will need to have enough sticks in the line to exceed your rod section length by about 8-10”. If by chance you don’t have enough sticks to complete the line, you can add one more from the top bundle to end up with two from the top bundle in that strip. The same goes for the sticks in the base section.

So at this point we have used a bamboo culm, hand saw, wire cutter pliers, pocket knife and a kitchen oven. Pretty cheap and minimal tools at this point.
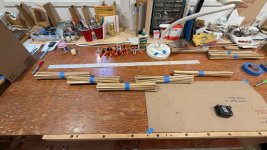
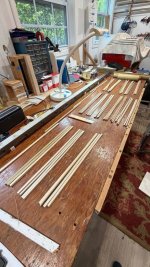
bundle 2.jpg


1794323840738.jpg
 

Attachments

  • 1794323658056.jpg
    1794323658056.jpg
    580.5 KB · Views: 4
Last edited:
Nice! Now your cooking? Do i need a convection oven or will any old one work? 😜
 
Thanks for posting this Mike. I have made some small furniture from hand tools only (stools, tables, etc.) and think I may have to give this a go at some point.
 
Chapter 2

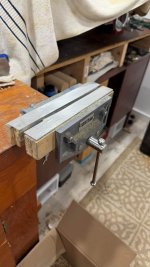
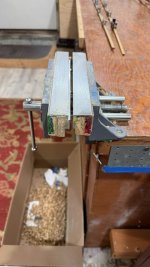
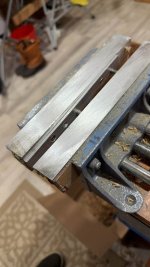
Now that we have all the sticks (kits as we call them) its time to make the splices to mate these sticks together. The splice angle I use is about 3 degrees. This will create a splice of about 5” long on a stick that is .300” wide. I have a vise and splicing block that my friend Tom Bowden generously gave me after he decided to upgrade and bought a new one. The core of the unit is a Central Machinery vise from Harbor freight. A couple blocks of wood, two short pieces of aluminum angle stock plus a short section of 1/8” X 3/4” aluminum flat stock for the “shelf”. I believe Tom said he spent about $30 total and a couple hours making this splicing block.

1794338026383.jpeg1794338026406.jpeg1794338026425.jpeg

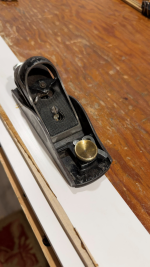
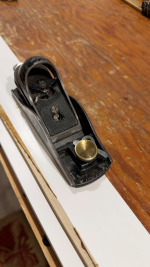
Next up on the list you will need a plane. You really don’t need anything special to get started, yes nice tools are fun, but they are expensive. A simple Stanley 9 ½ plane is what I am using for this adventure. It even has the stock iron, nothing special. These are very cheap at garage sales or off of secondhand sales platforms.

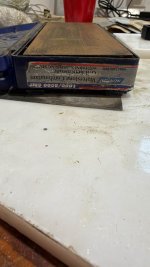
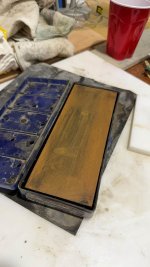
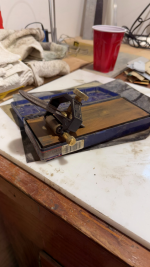
You need a way to sharpen said plane iron. I have a Norton Wet Stone with a 1000/8000 grit combination for this (looks like 1000/6000 grit is more common and economical). Another handy addition is a honing guide; this helps you keep the same angle on your edge sharpening after sharpening. Is this necessary, not really some wood workers can do this free hand without issue (but not me LOL). You are probably looking at about a total of $75 investment for new purchases. As always check the second-hand selling platforms to possibly find a bargain.


1794337823370.png


1794337746009.jpeg1794337746022.jpeg

1794337900749.png
 
Last edited:
Mike, when constructing the typical way, nodes are staggered. In this nodeless construction will you stagger the scarf joints? Or is that necessary?
for conventional hex rods I use a 3X3 node stagger. For a nodeless rod my mentors have said that it's unnecessary. So, I'm not going to worry about it. If the rod explodes, I'll come back and edit this comment:ROFLMAO:
 
thx for the process pics, and videos. very interesting. that glue is great with wood. as i was watching, i am wondering if the glue gives some stiff spots to the rod ??
 
So for the impact on the rod action of the nodeless construction the rod that I already made following a Martha Marie taper I think it might feel a bit faster for some reason. I have a conventional MM of the same taper that I will string up some time and cast them both side by side. I'll probably have them both at the 2027 Bamboo Fling for others to test out.

I think the larger impact on this rod is the fiberglass ferrule I plan to use on this taper. This rod is a copy of a Morris Cushner model B. So not having made this taper I will not have something to compare this rod to in a conventional making style.

My feeling is that a nodeless taper should not be that much different of a casting action. At the next fling we will see what you all think.
 
So let’s take a minute and review what we have done and spent up to this point.

Acquired a culm of Tonkin bamboo $60

18 minutes of use of your kitchen oven

Found a hand saw, diagonal wire cutter and a pocketknife

Bought a bunch of medium binder clips $10

Bought a used Stanley 9 ½ plane with adjustable throat $20

Bought a 1000/6000 grit wet stone and honing guide $70

Harbor Freight modified 6" vise to be a splicing block (est) $30

Bought up 20 1” Pony Clamps (4” long handle) $50

Bought a bottle of Tightbond III $10

80 grit sand paper $3

Snatched a roll of paper towels from the pantry

TOTAL SO FAR $253


So now we have 6 base strips and 6 tip strips glued up about 10” longer than the finished rod sections we want to make. We also have enough sticks to make a second rod, and all the equipment is paid for at this point. You also have gotten pretty good and sharpening your plane iron by splicing all these sticks. Rod number two is going to be free up to this point.

Next up will be initial rough planning to get the 60-degree angles initiated.
 
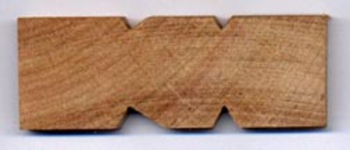
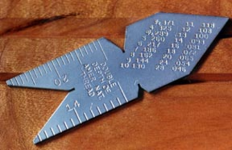
So now we will get the strips better suited to lay in an adjustable planing form. To start we will lay the strip on its side enamel edge down. You will see the sharp ends of the splicing possibly proud of the top edge of the strip; we will want to avoid “catching” this edge with our plane as we start to introduce the 60-degree angled edge to this side of the strip. You can start with a quick kiss of the 80-grit sandpaper that you used to dress the splices after planing them. Just enough to avoid having a edge that will catch the iron of the plane. There are two methods to begin to create the 60-degree edge. One method is to just free hand it. It really doesn’t need to be extremely accurate yet. Just close will be good enough. If you make three passes with the plane on one side, then flip the strip over and make three passes on the opposite side. You can do this in your adjustable planing form too. The other method is with a roughing form. A wood form about 2” wide with one asymmetrical slot and one triangular slot length wise one each side. Wagner Rods sells these for a reasonable cost or if you care to you can replicate one without much trouble (Bamboo Planing Forms and Rodmaking Tools). Another tool that you will need is a center gage for checking your angles as you plane out your strips. Those are also available from his site. Total cost to buy both would be about $100 including shipping.

1794587174676.png


1794587193772.png


Here is a picture of the side of the strip (enamel side away from the plane) where you can see the one edge that could catch the plane iron in a pass on the far enamel side of the strip. One of them would not matter as it is pointing the same direction as the direction of the path of your plane, the lower lip edge would be the one of most concern in this picture, both the side facing the plane and the pith side will need to be planed slightly to correct this problem.

1794587219418.png
 
Last edited:
To try to show how the splices are arranged here is a quick little clip looking at the enamel side of the bamboo strip just prior to gluing up. Each of the six strips are prepared the same way


Hey you might be stuck down there for a while! I'll get the varnish going next week or rent the Ferrari and buzz up with Carol!! 😆
 
:ROFLMAO: You might be right Bill. For those of you following this adventure we are visiting my son at their home in Ranch Mirage this week. Luckily, we got here Wednesday night so all is good. Who knows when we will get back but the plan is still the 18th so far. We shall see, if we have to stay for a bit longer....................... I can think of worse spots.
 
Aha, the scarf is cut across the enamel. Makes sense, since if it were offset 90*, all the enamel would be on one section while the other section has none. And it seems like that could lead to the joint coming apart more easily.
 
Back
Top