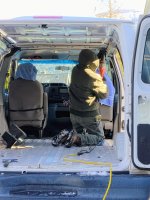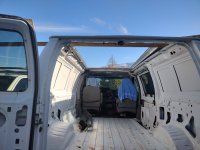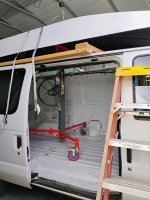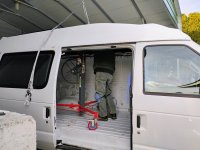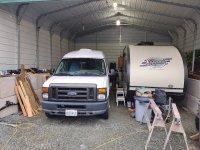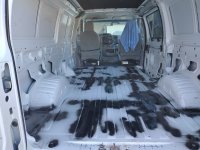
New remodel project.

I converted my E250 to a simple campervan many years ago. A couple of things I did that you might find useful in your thinking:

  • My powered vent fan is excellent. I used a Fantastic Vent fan, on a single fused circuit. It's been very nice and the only night we were uncomfy due to heat was in Death Valley (104F at 1:00 AM Local).
  • I put in another circuit with reading lamps. This is likely the most useful and handy thing I've done. The ones I bought initially are out of production, I've replaced with Wave One Marine Gooseneck LED lights from the large online retailer. They're great.
  • I also put a switch on the rear dome light. If you're sleeping and your partner gets up to take care of some midnight business, you really don't need the dome light to come on. A simple switch stops that.
  • And lastly, if you think you might need heat, google 5KW Cheap Chinese Heater. They are wonderful, though kinda screwy to retrofit into an Eseries.
  • Also, I see a lot of builds with 2x4 stick and 3/4 plywood. That is way overbuilt. Mine is 1/2" ply and 1x4 lumber, much weight (and space) savings and no problem with structural integrity.
I look forward to your progress.
 
I converted my E250 to a simple campervan many years ago. A couple of things I did that you might find useful in your thinking:

  • My powered vent fan is excellent. I used a Fantastic Vent fan, on a single fused circuit. It's been very nice and the only night we were uncomfy due to heat was in Death Valley (104F at 1:00 AM Local).
  • I put in another circuit with reading lamps. This is likely the most useful and handy thing I've done. The ones I bought initially are out of production, I've replaced with Wave One Marine Gooseneck LED lights from the large online retailer. They're great.
  • I also put a switch on the rear dome light. If you're sleeping and your partner gets up to take care of some midnight business, you really don't need the dome light to come on. A simple switch stops that.
  • And lastly, if you think you might need heat, google 5KW Cheap Chinese Heater. They are wonderful, though kinda screwy to retrofit into an Eseries.
  • Also, I see a lot of builds with 2x4 stick and 3/4 plywood. That is way overbuilt. Mine is 1/2" ply and 1x4 lumber, much weight (and space) savings and no problem with structural integrity.
I look forward to your progress.
I purchased a Vevor 5kw heater for the van. Did you pull combustion air from inside?

I'll go over the electrical in a future update when I get to it.
 
I purchased a Vevor 5kw heater for the van. Did you pull combustion air from inside?

I'll go over the electrical in a future update when I get to it.
No, I pull combustion air from outside, exhausting it outside (obviously). My heater unit is inside, with intake and exhaust through the floor. My fuel setup is kinda hillbilly, but it’s stood the test of yime….pm me if you need more documentation
 
Time for an update. I've been busy wrapping up a couple of jobs and doing my brush clearing and burning.
I ordered boat paint from Durabak. It's supposed to be 60 degrees out when it's applied but I wasn't going to wait. It seems to have adhered just fine but the self leveling was affected by the cooler temps. Not too worried about it, it's the roof of a 15 year old van. :) Put on two coats a few weeks ago and decided I wanted one more coat so I had to order more paint. Put the last coat on a few days ago.
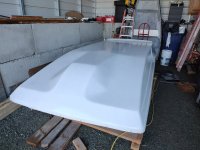
Painted.jpg
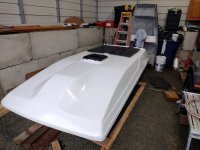
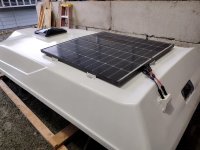
Today I mounted the solar panels and the powered fan.
Ready01.jpgSolar02.jpg

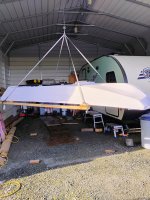
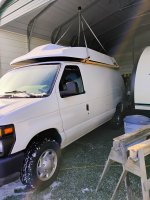
The next part of the project is to cut the roof out on my van. Before I do that I need to make a dump run and hit the car wash to get the edges of the roof that are going to remain super clean so the Dicor makes a good seal. I have a 400# hoist in my shed to lift it with and a 2x6 frame to lift it with. Then I'll drive the van under it and using a rented drywall lift to support it I'll un-screw the frame and then lower the roof onto the van with the lift. That will make more sense when you see the pictures of it being done.
 
Time for an update. I've been busy wrapping up a couple of jobs and doing my brush clearing and burning.
I ordered boat paint from Durabak. It's supposed to be 60 degrees out when it's applied but I wasn't going to wait. It seems to have adhered just fine but the self leveling was affected by the cooler temps. Not too worried about it, it's the roof of a 15 year old van. :) Put on two coats a few weeks ago and decided I wanted one more coat so I had to order more paint. Put the last coat on a few days ago.

View attachment 140361
Today I mounted the solar panels and the powered fan.
View attachment 140363View attachment 140362

The next part of the project is to cut the roof out on my van. Before I do that I need to make a dump run and hit the car wash to get the edges of the roof that are going to remain super clean so the Dicor makes a good seal. I have a 400# hoist in my shed to lift it with and a 2x6 frame to lift it with. Then I'll drive the van under it and using a rented drywall lift to support it I'll un-screw the frame and then lower the roof onto the van with the lift. That will make more sense when you see the pictures of it being done.


Sounds sketchy, if you need help just holler!
 
I got tired of waiting on the weather and decided to suit up and get the top mounted.
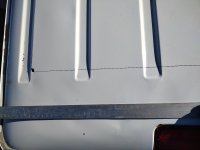
From the inside I drilled 1/2" holes in the four corners of the cut out area and one in the middle of the longer cuts. Then I went up on top with a straight edge and connected the dots.IMG_20250207_103911599.jpg

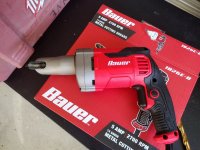
I then used this tool from Harbor freight to nibble through the metal. The tool has an adjustable head which allowed me to turn it 90 degrees so the handle wouldn't interfere when cutting.
IMG_20250207_102645060.jpg

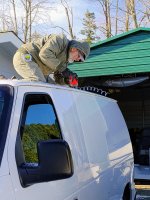
At this point it was time to climb up top and make the cut.
IMG_20250207_110016463_AE.jpg
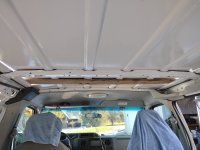
After cutting the top out, the main cross members are still intact. Since the metal is flexible I pushed some wood across and underneath it to support it while I cut the cross members from underneath with a sawzall.
IMG_20250207_111146735.jpg
IMG_20250207_111315617_AE.jpg

Removal.
IMG_20250207_111732500.jpg
 
Next it was time to get the new top up on it. Picked it up with the 2x6 frame I built to bring the thing home with and raised it up. Drove the van under it and lowered it on to it.IMG_20250207_114157155_HDR_AE.jpgIMG_20250207_115458645_HDR_AE.jpg

It was at this point I put the $44 rental Home Depot drywall lift inside the van to take the weight off of the 2x6 frame.
IMG_20250207_140044455_AE.jpg
Next I unscrewed the corners of the frame and removed it. Then lowered the top onto the van.
IMG_20250207_142016213_HDR_AE.jpg
All that was done on Friday and took me about four hours including two trips to Home Depot. The van was now ready to screw in place.
Saturday morning I got started early and started fastening it with self drilling screws. The screws go through an aluminum trim ring and then a vinyl cover is squeezed into place over the screw heads. 1" x 1/8" butyl tape is applied to the back of the trim to act as a sealant. Where it didn't quite fit tight at the corners Dicor self leveling lap sealant was applied. Not sure if you can see it that well in this photo.
IMG_20250208_120715816.jpg
Only one more thing to do which will be done this morning. I need to caulk around the inside and since I can't get the caulking gun all the way into some areas I need to go pick up some tubing to slip over the nozzle of the caulking tubes.
 
I love this thread. Ingenious and great work. 👏
How much headroom did you gain with the new roof?
Not quite enough to stand up straight. If I tilt my head down to look at the floor I can walk around no problem. A great improvement over the 4-1/2' that it had. That always forced me to bend at the waist when I was working out of it.
 
nice work. i forget, how much does the roof weigh? keep on posting your work. i have a completed sprinter, purchased with all the stuff, but i am always thinking about what i would do differently...
 
nice work. i forget, how much does the roof weigh? keep on posting your work. i have a completed sprinter, purchased with all the stuff, but i am always thinking about what i would do differently...
I'd say it's between 150 - 200 with the add ons.
 
Not quite enough to stand up straight. If I tilt my head down to look at the floor I can walk around no problem. A great improvement over the 4-1/2' that it had. That always forced me to bend at the waist when I was working out of it.
Two Dodge factory van conversions with fibreglass roof tops were my daily driver for over two decades, as well as my weekend fishing getaway sleepers. During winter could sit inside and change into my wetsuit, go surf, change out of my wetsuit inside when done, feet and wetsuit into a plastic tub.
On camping trips the higher roofline created extra room for sitting up on the rear bed in the evening when reading, or if the weather changed sitting in a low camp chair inside while preparing a meal on the Coleman stove placed next to the open side door.
Great job!
 
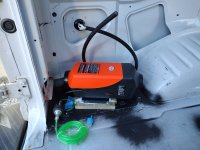
Ok here's the latest. The first thing to do is get the flooring in. I wire brushed the rusty spots and painted them with Rust Reformer. Next I installed the body of the diesel heater because I don't want flooring under it.IMG_20250210_140729426.jpgIMG_20250212_141325032.jpg

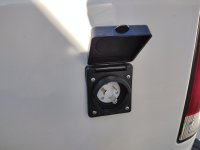
While I was at it I installed the external RV plug also.
IMG_20250212_140203237.jpg

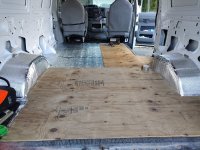
Then I put down 1/8" double foil backed foam, then 1/2" plywood with treated plywood near the doors.
IMG_20250214_131214164.jpg

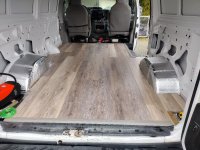
After the plywood I floored it with vinyl plank flooring and used metal transition strips on the edges where it will show.
IMG_20250216_110716265.jpg

The next phase will be to prewire the 12v power outlets, 120v plugs, the dc to dc charger and route the fan wiring and solar wires into the electrical area. I also plan on running some flexible tubing to certain areas for future addons. Then we insulate the walls a little bit and install the side panels. After that I'll build the bed platform and garage/utility area so the electrical can be hooked up. After that I'll deal with the edges of the roof cut out by incorporating some foam over wood and covered with fabric because I know they'll be head bangers
 
I've had a bit of a setback in this project due to my daughter needing an emergency roof replacement and my sil working out of town. He was able to come back for one day, (shithead boss) to tarp off the entire roof. I was tapped to keep the tarps in place while the wind and rain came through and contract out the new roof. The roof is done and we are now doing leak mitigation. But on to the van because I did get some work done on it during all of this.

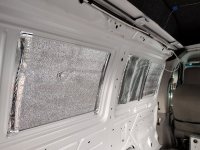
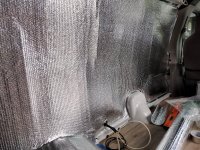
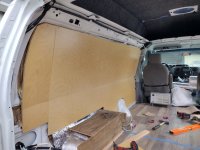
It was mentioned to frame with 1x4 and use 1/2" plywood. Since this is generally a spring through fall fishing van and no winter camping to be done I skipped the whole framing part, put double foil backed closed cell foam directly on the walls and then paneled. The other reason for doing this was to try and get the bed in there in the east/west configuration.

IMG_20250222_090506539.jpg
IMG_20250222_100727736.jpg
IMG_20250224_122317631.jpg

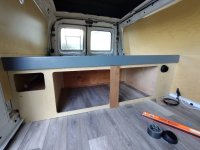
As you can see in the pictures I have also done a bit of pre-wiring. I have also just about completed the bed platform but have yet to take any pictures. The platform is 72" long. The 4" mattress I have for it is 75" x 38" with a washable cover. When I unpackage it and let it expand We'll see if I need to cut any off the length. More pictures coming this afternoon.
 
Back
Top