
Navigation
Install the app
How to install the app on iOS
Follow along with the video below to see how to install our site as a web app on your home screen.
Note: This feature may not be available in some browsers.
More options
Style variation
You are using an out of date browser. It may not display this or other websites correctly.
You should upgrade or use an alternative browser.
You should upgrade or use an alternative browser.
New remodel project.
- Thread starter _WW_
- Start date
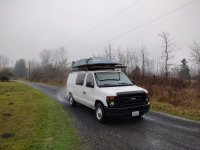

hmmm, u going to pop the top on that van? good luck with your project.

Changing it from a work van to a fishing van.hmmm, u going to pop the top on that van? good luck with your project.

Hell yeahChanging it from a work van to a fishing van.

nice...see insulation and panelling in your futureChanging it from a work van to a fishing van.


the_chemist
Life of the Party

Nice idea… a bit more sitting headroom is desirable….

What size motor are you planning to power that with?
5.4 liter V-8.What size motor are you planning to power that with?

Just needs a few Flex Seal decals and he'd be an overnight infomercial star.

Parts are starting to arrive. The initial order of stuff includes a roof fan, diesel heater, DC-DC charger, fuse box, Shore power connection, ceiling fabric and adhesive, and sealant for when the top gets attached.
Soon to be for sale:
Roof lumber/ladder rack with rear roller bar and an entire setup of Adrian Steel shelving, lockable cabinets, divider wall, and center console cabinet for between the seats. All the things a contractor needs for a van. Stuff will fit 1992-2014 E-series vans and most of it will also fit GMC and Chevy vans.
Soon to be for sale:
Roof lumber/ladder rack with rear roller bar and an entire setup of Adrian Steel shelving, lockable cabinets, divider wall, and center console cabinet for between the seats. All the things a contractor needs for a van. Stuff will fit 1992-2014 E-series vans and most of it will also fit GMC and Chevy vans.

Jeff Dodd
Steelhead
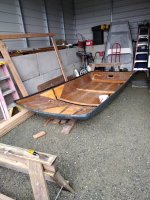
What kind of pram is that in the background? Looks to have good beam and a combination of materials. I like it! Will it be transported on the newly modified van?
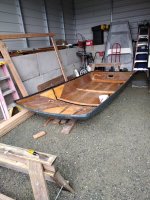
Another project! That pram is 7-1/2 feet long and I picked it up about a year ago. I'll have to go out and shoot a picture of the tag but as I recall it was made locally. Fiberglass with wood trim and weighs around 60 lbs. I bought it for the future when I'm no longer able to load and unload my pontoon boat. The van will have a trailer hitch so I may pick up a trailer for it in the future. For now I want to be able to pull my 16' Hewescraft and still have a place to sleep at night.
Update! Last night I sold the lumber rack and all the metal cabinets currently in the van so in the next couple of weeks I need to empty out all my work tools and stuff from the van so they can be removed. He took the lumber rack last night.
Meanwhile I have been working on the top for the past few weeks.
First I had to remove all the framing from the inside and scrape the old sealant off. Using a grinder with a sanding pad attachment was what I made the final pass with. I then ran some 1-1/2" painter's tape around the edge to protect it from contact adhesive contamination. I also used the tape to define a center line to line up the two pieces of fabric to be glued on.
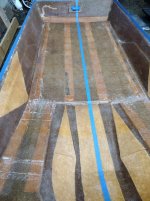
As you can see there are some strips of wood embedded in the fiber glass. For future reference I took measurements from the center line.
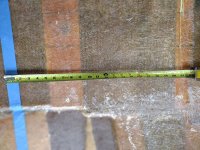
Next it was time to glue in the fabric. This is what I chose to use:
After gluing it in and trimming the edges I went around the perimeter with more tape to define a line for me to trim the material and leave some raw glass for the new sealant to adhere to.
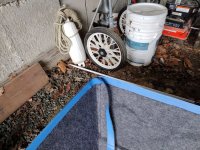
After trimming, I then removed the first tape application.
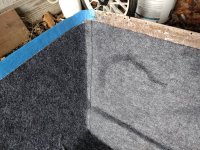
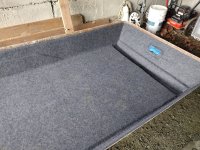
Then it was flipped over so that I can sand, clean the outside and paint it white with some Durabak boat paint.
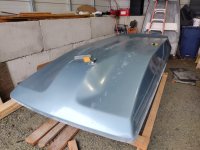
As of right now it is sanded and ready for painting this weekend. After the painting process I am going to mount two 100 watt solar panels and an RV fan to the roof before it goes up on the van. Much easier for me to do right now while it sits on top of a couple of saw horses.
Meanwhile I have been working on the top for the past few weeks.
First I had to remove all the framing from the inside and scrape the old sealant off. Using a grinder with a sanding pad attachment was what I made the final pass with. I then ran some 1-1/2" painter's tape around the edge to protect it from contact adhesive contamination. I also used the tape to define a center line to line up the two pieces of fabric to be glued on.
As you can see there are some strips of wood embedded in the fiber glass. For future reference I took measurements from the center line.
Next it was time to glue in the fabric. This is what I chose to use:
After gluing it in and trimming the edges I went around the perimeter with more tape to define a line for me to trim the material and leave some raw glass for the new sealant to adhere to.
After trimming, I then removed the first tape application.
Then it was flipped over so that I can sand, clean the outside and paint it white with some Durabak boat paint.
As of right now it is sanded and ready for painting this weekend. After the painting process I am going to mount two 100 watt solar panels and an RV fan to the roof before it goes up on the van. Much easier for me to do right now while it sits on top of a couple of saw horses.
Probably not. This is going to be used for shorter excursions both in distance and time. That MT and ID trip is a month long and I much prefer the R-Pod trailer for camping that long. However as I age out of rowing Swimmy down the river I may switch over to the van for shorter duration trips out there.Is this Van going to be at Henry's this year ? Would love to see the finished product in person .

Probably not. This is going to be used for shorter excursions both in distance and time. That MT and ID trip is a month long and I much prefer the R-Pod trailer for camping that long. However as I age out of rowing Swimmy down the river I may switch over to the van for shorter duration trips out there.
In any event , hopefully we will meet up again this year on Henry's .