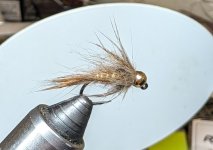
Composite Dubbing Loops

Tom Butler

Grandpa, Small Stream Fanatic
Forum Supporter
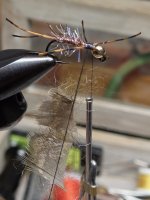
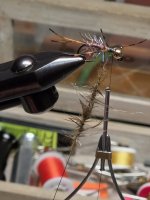
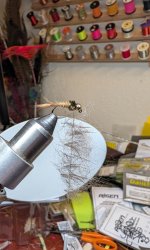
So I struggle with these and often just end up spinning a softhackle. I got some clips but I'm not having a lot of success with them.
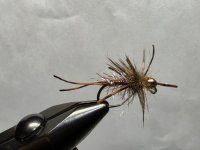
Working with hare’s ear plus and grouse.
Any tips or video links appreciated.
1738.jpg
1739.jpg
 
I've created some absolute monstrosities of composite loops, but have certainly gotten better over the years. Things that help:

A piece of paper with a vertical line on it. Build your material using the line as were the loop will hold the material.

Take the time to align your fibers so they are perpendicular to the loop. Fibers running parallel to the loop are killers.

When you form your loop, run your thread back over the top of the loop to "close" it. Getting the 2 stands to exit the shank from the same point on the shank, as opposed to from either side of it.

Wax. Thick wax, lightly applied to just one of the strands.

Use dubbing to sandwich your other materials from either side, and just a bit.

Take the time to properly fold the spun loop with wetted fingers to make it behave like a hackle.

Pick and brush it all to hell. It can always get thinner.

You succeed or fail on the table, before it goes in the loop. The time spent straightening and evening the material out on the table makes all the difference.

 
I've created some absolute monstrosities of composite loops, but have certainly gotten better over the years. Things that help:

A piece of paper with a vertical line on it. Build your material using the line as were the loop will hold the material.

Take the time to align your fibers so they are perpendicular to the loop. Fibers running parallel to the loop are killers.

When you form your loop, run your thread back over the top of the loop to "close" it. Getting the 2 stands to exit the shank from the same point on the shank, as opposed to from either side of it.

Wax. Thick wax, lightly applied to just one of the strands.

Use dubbing to sandwich your other materials from either side, and just a bit.

Take the time to properly fold the spun loop with wetted fingers to make it behave like a hackle.

Pick and brush it all to hell. It can always get thinner.

You succeed or fail on the table, before it goes in the loop. The time spent straightening and evening the material out on the table makes all the difference.
Thx, some noted errors and good fine points. I usually don't bother to bring the thread loop sides tight before spinning.
 
You succeed or fail on the table, before it goes in the loop. The time spent straightening and evening the material out on the table makes all the difference.
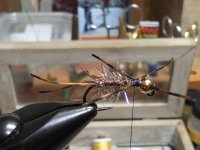
It always takes longer than you think to prep the materials, then take even longer after you think its done.
 
I've created some absolute monstrosities of composite loops, but have certainly gotten better over the years. Things that help:

A piece of paper with a vertical line on it. Build your material using the line as were the loop will hold the material.

Take the time to align your fibers so they are perpendicular to the loop. Fibers running parallel to the loop are killers.

When you form your loop, run your thread back over the top of the loop to "close" it. Getting the 2 stands to exit the shank from the same point on the shank, as opposed to from either side of it.

Wax. Thick wax, lightly applied to just one of the strands.

Use dubbing to sandwich your other materials from either side, and just a bit.

Take the time to properly fold the spun loop with wetted fingers to make it behave like a hackle.

Pick and brush it all to hell. It can always get thinner.

You succeed or fail on the table, before it goes in the loop. The time spent straightening and evening the material out on the table makes all the difference.
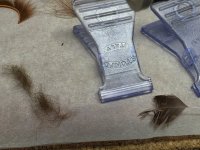
These are all great tips. Especially the card one (I have one of the laminated Jerry French cards, but they're literally just laminated cardstock with a vertical and horizontal lines on it) and the brush it out. Taking classes with Jerry this was my biggest take away, if the material isn't staying when you brush it out it probably won't stay on the fly.
 
Watch some Jerry French videos, this will help shorten the learning curve with key points and fundamentals.
 
These are all great tips. Especially the card one (I have one of the laminated Jerry French cards, but they're literally just laminated cardstock with a vertical and horizontal lines on it) and the brush it out. Taking classes with Jerry this was my biggest take away, if the material isn't staying when you brush it out it probably won't stay on the fly.
Pretty much everything I've learned about loops comes from Jerry and a dude that learned from him.
 
Tom, that looks like a fantastic summer steelhead or SRC fly. I think if you had added a little bit of dubbing to cover the body it would look great backing that flashy stuff.

I personally don’t do it this way I just use a dubbing blend with bit of flashy holo stuff in it. I’m a lazy fly tier and think of flies as lures with simple components and believe the fisherman is more important than the fly. If I could whip out one of your fly looking just like that in 2.5 minutes I would do that. The fish don’t care. Fish those nymphs and lose them, no big deal, and the fish honestly love that weird looking imperfect stuff.
 
A gentleman fly tier and fly angler once told me that it shouldn't take longer to tie a fly than it takes to lose it.

So my patterns are pretty danged fast to tie. .... at least most of them.

I have a hard enough time using a simple dubbing loop so it would serve me no positive outcome to try something even more complicated. However, if you have no trouble with the technique, go ahead on.
 
I've created some absolute monstrosities of composite loops, but have certainly gotten better over the years. Things that help:

A piece of paper with a vertical line on it. Build your material using the line as were the loop will hold the material.

Take the time to align your fibers so they are perpendicular to the loop. Fibers running parallel to the loop are killers.

When you form your loop, run your thread back over the top of the loop to "close" it. Getting the 2 stands to exit the shank from the same point on the shank, as opposed to from either side of it.

Wax. Thick wax, lightly applied to just one of the strands.

Use dubbing to sandwich your other materials from either side, and just a bit.

Take the time to properly fold the spun loop with wetted fingers to make it behave like a hackle.

Pick and brush it all to hell. It can always get thinner.

You succeed or fail on the table, before it goes in the loop. The time spent straightening and evening the material out on the table makes all the difference.
👆👆👆👆👆👆👆👆👆👆👆👆👆👆👆👆👆👆👆👆👆👆👆👆👆👆👆👆👆👆👆👆👆

Also, keep a cup of water nearby, to get the wetting needed. You'll need more liquid than your saliva can provide. Plus, ew.
 
Try tying in the feather (still on stem) tip first; create dubbing loop; wax one thread; add dubbing after teasing strands so they align; lightly dub strands perpendicular to waxed thread; insert feather; gather threads, dubbing, and feather clipped together in hackle clip and spin… brush or tease out as you spin. Wrap like a collar hackle in front or palmer wrap the body.

Try it with dry fly hackle or webby hen hackle to see the differences. Another to observe, is tying the feather in by the tip vs the butt end, shiny side forward or back from the hook eye.
 
Last edited:
what is a "composite" dubbing loop? Isn't it just a dubbing loop?
With a composite loop you are looking to put more than one material into the dubbing loop. Here I'm using fur and softhackle feathers. Fur and marabou is common in larger flies. Just another way to combine materials and cover the hook.
 
Back
Top