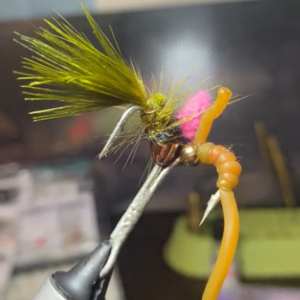
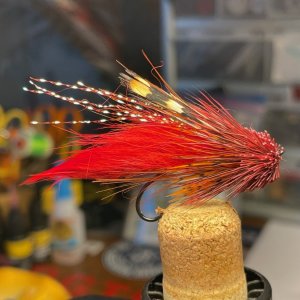
The Cherry Pie Hopper was conceived in 2008 when I realized that tying it was as easy as making a Cherry Pie. Early August in Montana is hopper time and its also the time that pie cherries become ripe. A cherry pie is a simple mixture of pie cherries, sugar, flour and spice baked in a flakey pie crust. So too, the Cherry Pie Hopper is a simple construction of common (save one) fly tying materials into an effective hopper pattern.

Hook: Firehole 718, #8 (any similar hook will work)
Thread: UTC 140 (color irrelevant)
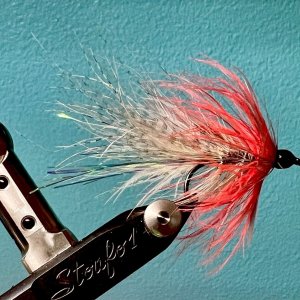
Tail: Stacked clump of deer hair
Underbody: Dry fly dubbing palmered with dry fly hackle
Body: 2, 3 or 2x2mm bi-color foam cut from Riverroad Creations Medium Beavertail cutter
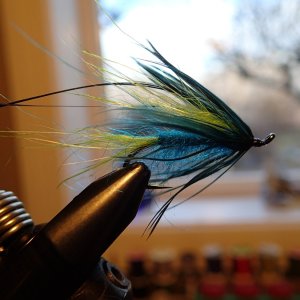
Wing: Deer hair
Legs: Round rubber or flexy floss legs
Head: Formed from body foam

Steps:

- Cut the foam body from any color foam. My favorite foam is bi-color foam made from two sheets of 2mm foam using adhesive contact cement. 2 and 3mm work fine as well. Single 4mm foam is usually too stiff to form the head properly.
- After laying a thread base, tie is a small clump of stacked deer hair for the tail. The clump should cover two thirds of the hook shank and extend ~ 1/4” beyond the hook bend.

- Tie in a dry fly hackle at the hook bend. Saddle hackles work well here.
- Dub the underbody with dry fly dubbing for ~ two thirds the length of the hook.
- Palmer the dry fly hackle forward to the end of the dubbing creating even spacing between wraps and tie off.
- Trim the top of the hackle along the top of the hook shank.

- Apply a sparse amount of superglue to the entire length of top of the underbody.
- Take the foam Beavertail body and lay it centered on top of the underbody with the second indentation aligned with the front of the underbody. While pressing firmly on top of the foam with your finger, take several tight wraps around the second indentation. Hold for about 30 seconds to firmly attach the foam body to the hook.

- Cut a clump of straight deer hair for the wing. Clean out the fluff. Stacking is optional. Measure the hair against the end of the foam body and trim flush ~ 1/8” longer than the foam tie in point. Lay the hair on top of the foam and tie in with 3-4 strong wraps at the foam tie in point. Push the tie in point down with your finger to flair the hair and distribute evenly.
- Add a small drop of head cement to the wraps and hair butts at the wing tie in point. DO NOT use super glue here as it will cause rubber legs to become brittle and eventually break.

- Fold the remaining foam backwards over the hook eye to slightly cover the wing tie in point. Adjust the bend so that the front of the foam is just above or slightly behind the hook eye. Take 3-4 tight wraps to secure the foam.

- Cut two round rubber or flexy floss sections for the legs and tie in on each side of the foam tie in point. Adjust legs so they are along the sides of the foam.
- There should be ~ 1/8 to 1/4” of bare hook shank showing behind the hook eye on the underside of the fly. Cover the bare shank with thread wraps and take a couple of double half-hitches to secure the thread. Before cutting the thread, apply a liberal amount of head cement to the thread wraps on the bottom of the fly, including those at the foam tie in point.