
Navigation
Install the app
How to install the app on iOS
Follow along with the video below to see how to install our site as a web app on your home screen.
Note: This feature may not be available in some browsers.
More options
Style variation
You are using an out of date browser. It may not display this or other websites correctly.
You should upgrade or use an alternative browser.
You should upgrade or use an alternative browser.
YOLO! - FlyBillz' First Bamboo Build
- Thread starter flybill
- Start date


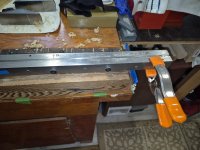
We do have the Bellinger Planing forms set to the taper (recipe) for the base section of the Martha Marie taper we have decided on. This is the thicker section with the grip and reel seat. We are planing all the tip strips in this first. The reason for this is to check the taper we have the form dialed into. We will plane most of the strips to about the set but the last of the tip strips to the surface of the form that will limit how much we can remove. Then measure the strip. If we need to make some adjustments (most likely) we will do those then plane another one of the tip strips to the form surface. If we are good, then we will start to plane the base strips to the taper numbers we are looking to hit. We should not need to make any more adjustments. By doing this we accomplish two goals, getting the form set without the chance of over planing a base strip to undersize (garbage now), plus now the tip strips are reduced considerably in size and are much quicker to plane to the smaller tip setting we will make on the opposite side of the planing form after all the base strips are done.

Bambooflyguy
Legend
This step with the tip sections seems the scariest to me…..man those are tiny strips at the tips! Keep up the good work……makes me want to stick to my Hotrodz!
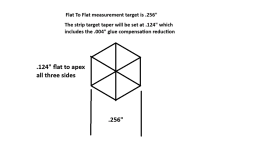
Well after a spring vacation on a Cruise Ship it's time to get back to Bill's adventure making a bamboo fly rod. We are moving on the important details now. Time to try to hit some numbers repeatably every 5" on six strips to complete a tapered strip for a section before glue up. At each of those 5" stations we will measure the flat to apex on all three sides on the triangular strip. If that station is right the measurements will be within a .001-.002" of each other to guarantee a glue line will not appear after we glue up the section. In some ways this is more time consuming, but once you get the first strip dialed in the production of strips to taper will become quicker. Plane down to the form's surface and keep the planes sharp and properly set you should be able to hit the numbers without a lot of trouble.
The form is set to a recipe for Martha Marie taped rod (7'6" 5wt two piece). I have found that I need to reduce the measurements by .004" to allow for the addition of the glue to create the shaft. and hit the finished taper's numbers flat to flat. This is something that works for me to be able to meet my recipe after the glue is dried. For the tip section strips I will only deduct .002" seeing as the strips are smaller and it works for me. I can't say that anyone else does it this way, but this is what works in my shop.
I'm hoping that Bill will get that first strip of the base section to hit the numbers in our next visit. Time to make some more curls of bamboo.
Mike
The form is set to a recipe for Martha Marie taped rod (7'6" 5wt two piece). I have found that I need to reduce the measurements by .004" to allow for the addition of the glue to create the shaft. and hit the finished taper's numbers flat to flat. This is something that works for me to be able to meet my recipe after the glue is dried. For the tip section strips I will only deduct .002" seeing as the strips are smaller and it works for me. I can't say that anyone else does it this way, but this is what works in my shop.
I'm hoping that Bill will get that first strip of the base section to hit the numbers in our next visit. Time to make some more curls of bamboo.
Mike
Last edited:
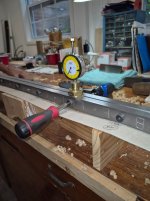
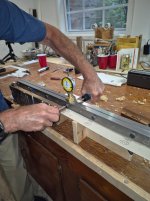
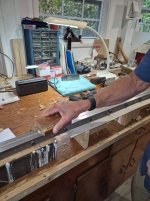

Today Bill planed down one base strip to the form surface to test the "set" that I applied earlier in the process. After a few adjustments and some head scratching, we are now VERY close to the measurements we want at each of the set stations. The strip that Bill was planing for this turned out to be not acceptable due to some cosmetic blemishes on the enamel side. I thought they were not deep and would be gone once the enamel was removed but that didn't happen. That is the reason that we have 9 base strips roughed out to end up with six keepers for the base section. Disappointing to hit the numbers and see the blemish but it's better to toss the strip and pick a better candidate and not regret it after glue up.
Today was a slow process but Bill got to see how to bring the form into the taper numbers we want to replicate six times. Fun day making curls again and using my $2 scraper plane while the Lie Nielsen scraper is lying on the bench idle LOL. That's another story I'll share as we continue down this road.
Mike
Today was a slow process but Bill got to see how to bring the form into the taper numbers we want to replicate six times. Fun day making curls again and using my $2 scraper plane while the Lie Nielsen scraper is lying on the bench idle LOL. That's another story I'll share as we continue down this road.
Mike
Oh, and you might see that strip of cardboard with the numbers on it near the form. That is a drywall shim strip that I mark all my station settings on so I can check the strip for accuracy. The nice thing is that for each taper I make I have this to set the form to the taper it represents and save them for future use.
Mike
Mike
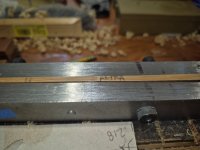
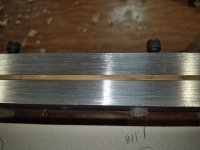
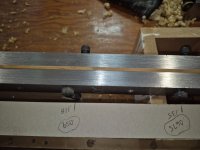

so the bamboo 'strips' just sit in the groove, while you plane or scrape them? i would think they would move??

The grove is tapered, so it doesn't move, plus we clamp down the end. Lots of details that Mike is teaching me! This session we, well Mike showed me how to, spent a lot of time adjusting the planing form to the Martha Marie taper we're doing. Its set for the butt section of the rod. When we have the 6 final pieces, the planing forms will be setup the the 6 tip sections and the hand planing will continue! More next week!so the bamboo 'strips' just sit in the groove, while you plane or scrape them? i would think they would move??
Here's a picture from a previous post where you can see the piece clamped down.
Last edited:
Bill and I had another rod making session today. We are zeroing in on the base strips now. Bill planed a strip and for some reason it was under sized so he had to grab another strip and try again and we tried to figure out what went wrong. The second strip was much better, good enough to keep. So now the form is dialed in, and Bill will have five more to plane to taper. During our session I dropped my dial indicator on the floor that I use to set the form, bad news! It was way out of wack from hitting the floor. Luckily after closer inspection it had just shifted in the heavy base section a bit. After some readjustments we were back on track with some accurate readings of the form again. From here forward it's nothing but planing and checking measurements, so there won't be much to share. When we get to pre glue up things will get interesting again before the big day, Glue Up.
Bambooflyguy
Legend
It would be cool to meet up at some lake to witness Bill’s first fish on his flybill Hotrod!! Let’s plan something…..
That would be fun! Today Mike and I met up, and now have 3 short strips ready for the butt section. The next 3 will be long to space the nodes in a separate pattern.It would be cool to meet up at some lake to witness Bill’s first fish on his flybill Hotrod!! Let’s plan something…..
Some more tweaking of the planing forms and me refining my planing. A combination of feel, sound and watching how the curls come off of each piece and you can move quicker than I thought. Mike knows how to setup things and has refined his process over 20 years of building!
We also reheated nodes when necessary to help the pieces sit straight in the planing forms. Plus paying attention to the sharpness of the blades in the planes and on the scraper Mike uses.
Also learning about the enamel and how to work on each side to get the strip finished to the specs that are setup on the planing forms.
Much that I've probably missed, Mike can fill in or ask questions. I'm really enjoying the process of learning! We'll be back at it Thursday! Cheers!
Making a bamboo fly rod is not a quick process by any means. We are moving three steps forward then two steps back at times. You would think it's frustrating but really all it is doing is letting you know you should have spent a bit more time on the previous step. The fewer times you have to repeat a step the more efficient you are, pretty simple LOL.
One issue that I am dealing with is that I usually make one or two rods a year over the winter. Last winter I skipped it so my ability to polish my skills in on all the different procedures takes a bit of time to sharpen (testing my patience at times). There is a lot of "touch" or "feel" that you depend on as feedback letting you know that you, the tool and the method are in unison and accomplishing the task at hand. That being said when things are right it's an amazing feeling. Steve commented on a video I posted earlier about the sound of splitting the bamboo being mesmerizing, I'll try to make another video clip with sound of the hand, a well-adjusted plane and bamboo strip making the mesmerizing sound you want to hear while planing to your taper.
Mike
One issue that I am dealing with is that I usually make one or two rods a year over the winter. Last winter I skipped it so my ability to polish my skills in on all the different procedures takes a bit of time to sharpen (testing my patience at times). There is a lot of "touch" or "feel" that you depend on as feedback letting you know that you, the tool and the method are in unison and accomplishing the task at hand. That being said when things are right it's an amazing feeling. Steve commented on a video I posted earlier about the sound of splitting the bamboo being mesmerizing, I'll try to make another video clip with sound of the hand, a well-adjusted plane and bamboo strip making the mesmerizing sound you want to hear while planing to your taper.
Mike
Last edited by a moderator:
I managed to make a quick recording of Bill making some curls of bamboo. If you listen the plane shaving the bamboo strip sounds very similar to stripping a wrapping ribbon over scissors to make a decorative bow for a present.
Mike
Mike
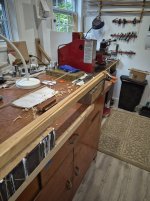
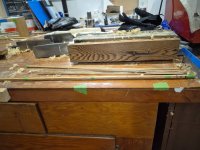
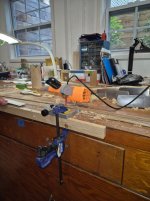
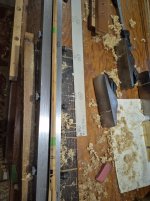
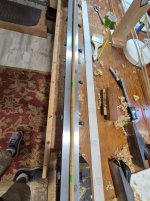
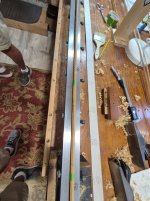
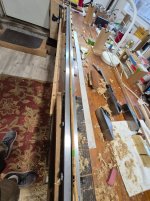
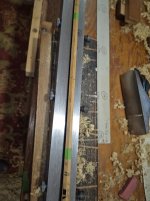
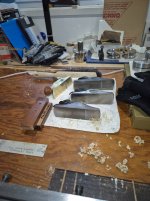
Pictures from today! Got the pieces for the butt section to spec. Bundled up and ready for the next steps. We'll work on the tip sections next, that have already been planed down the the butt section pieces. Will go through tomorrow and add a little more info. A longer season today, dealing with things as they came up! Super fun too!
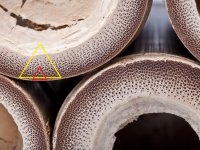
More details for those of you who are curious. Power fibers, why are they important? these are what gives the bamboo flyrod it's action. More and denser power fibers are what rod makers want in their rods when all is said and done. The enamel is the outside layer of the bamboo culm that protects the power fibers, but it does not have any strength so it must come off plus normally there are cosmetic blemish issues with it. We wait as long as possible to remove the enamel to save as many of the power fibers as possible. In the picture below the yellow triangle represents a roughed-out strip. If we removed the enamel at this point you can see we will lose some densely packed power fibers, more than necessary. If we wait until we have planed the strip to near our target taper when we remove the enamel, we retain more of the dense collection of power fibers. So, there you have it, power fibers are important to a bamboo fly rod.
Mike
Mike
Now that Bill has the base strips to taper it's time to flip the form over to the small V-Groove for planing the tip strips. If you remember Bill planed the tip strips in the base taper V-Groove earlier to dial in the form. Those tips strips are about two thirds of the way to taper. They will lay nicely in the form and the material to be removed will be much less than before. I have the form set to taper and ready for Bill's next visit, more curls to come.
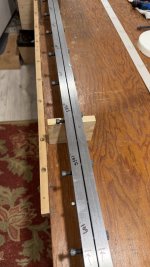
Some pictures from this morning! Working on the tip strips, almost done with strip #3 of 6. Things are moving along quite well!
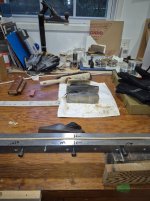
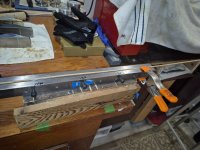
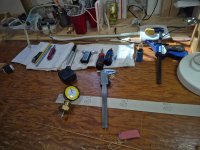
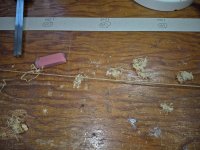
Mike had all of the planes and scrapers setup and ready to go. We've already taken these down to the butt section taper, so it's moving right along!
Mike had all of the planes and scrapers setup and ready to go. We've already taken these down to the butt section taper, so it's moving right along!