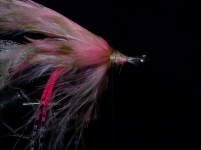

SBS – The Dancing Deceiver (bucktail deceiver variation)
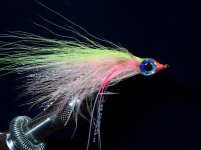
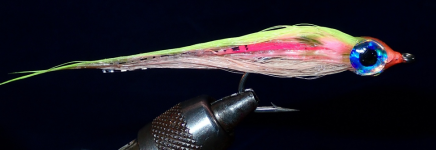
The Lefty’s Deceiver fly pattern or more appropriately the deceiver style can be tied with lots of variations for both freshwater and saltwater targets. The Dancing Deceiver as I call it incorporates two additional materials—marabou and silicon legs. The marabou inspiration comes from the marabou method used in the Gartside Soft-hackle Streamer while the silicon legs are a common component in many saltwater patterns. Their purpose is movement and contrast. Variegated, bi-colored silicon legs provide subtle movement and contrasts when the fly is wet. Marabou, especially barred marabou, also provides movement and contrasts when the fly is wet.
Steps:
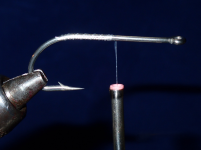
1. Create a thread base on the back half of the hook shank to the hook bend aligned with the hook barb. Leaving the front half of the hook shank bare helps maintain room for the middle section and bucktail.
2. Select a small clump of bucktail for the tail. Trim to desired length. The tail should extend 1 to 1.5 times the hook shank length. The tail is tied in at the middle and on top of the hook shank leaving the forward part of the hook shank bare.
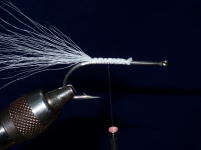
3. Tie-in the desired number of flash fibers on top of the hook shank. The flash should extend to just short of the bucktail tail.
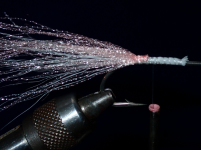
4. Tie-in and tightly wrap the rear half of the hook shank with flat braid. The braid helps keep the tail fibers and flash straight while protecting the wraps for both the bucktail and flash. Flat braid is fragile and to protect it from fraying caused by toothy fish, coat the braid body with head cement.
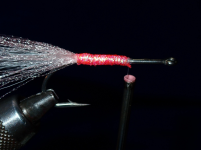
5. Select 3-4 strands of bicolored, variegated silicone legs. Fold in half and tie-in the ends just in front the braid body. The legs should be tied-in on top of the hook shank and form a loop over the tail. Cut the loop to create six or eight legs.
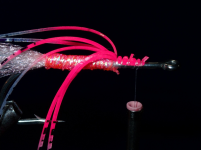
6. Tie-in the barred marabou immediately in front of the silicone legs and braid body. There are three configurations that can be used for the marabou. 1) Tie-in a flexible marabou feather by the stem and wrap it forward around the hook shank like hackle. Tie it off and fold back the tip of the feather. 2) Tie-in a single clump of marabou on top the hook shank. 3) Tie-in two clumps of marabou on top and bottom of the hook shank. This configuration allows you to use different color combinations of marabou if desired. When the marabou is tied-in and/or wrapped take a number of thread wraps back over the base of the marabou to help sweep it back over the body. Additionally, clean thread wraps over the marabou creates a clean, smooth base for the bucktail wing and belly. You should have at least ¼” – 3/8” of space at the front of the hook to securely tie-in the bucktail.
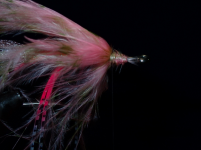
7. Take a slender clump of bucktail for the top wing and cut to desired length. Ideally, the bucktail wing should extend to or slightly beyond the bucktail tail. Trim the butt ends squarely flush and tie-in just behind the hook eye. Take a number of tight thread wraps over the bucktail back to the base of the marabou. At the base of the marabou, press firmly down on the bucktail to flatten and flare the fibers slightly down the sides of the fly.
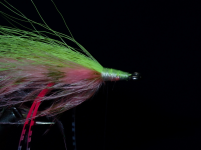
8. Repeat the process for the belly wing and take enough thread wraps to completely cover the bucktail with a smooth head.
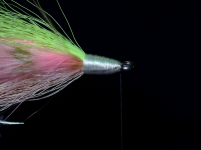
9. If you are using colored thread, tie-off with a whip finish or several double half hitches and proceed to step 10. If using white thread, tie-off with a whip finish or several double half hitches and before trimming the thread, you can color the head wraps with any color you desired using an alcohol marker or sharpie. Allow the color to dry a minute before cutting the thread.
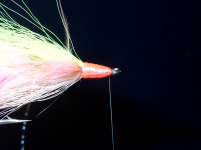
10. Mounting the eyes. A rotary vise is of great benefit here for the four-step process of mounting the eyes and finishing the head. 1) Rotate the vise 90 degrees so that the side of the fly is facing up. Apply a small drop of UV resin at the junction of the thread wraps and the materials. Place the desired eye so that is covers the junction with ~ half the eye above the hook shank and half the eye over the material. Holding the eye in-place with your finger, quickly cure the UV resin. This tacks the eye in-place. Repeat for the other side of the head ensuring the eyes are aligned top and bottom, front and back. 2) Place a dollop of UV resin between the top of the eyes while holding the bucktail down. Cure the UV resin. Repeat for the bottom of the eyes. It is important to confine the UV resin as much as possible between the eyes to allow it to penetrate and not run while holding down the bucktail. 3) Apply a thin coat of UV resin over the remainder of the thread wraps while also covering the eyes with resin. Ensure no resin blocks the hook eye. Apply resin just beyond the rear of the eyes. The resin will run if too much is applied. Rotate the fly until the resin levels, then cures while continuing to rotate. 4) Once cured, apply a thin coat of head cement over the cured UV resin.
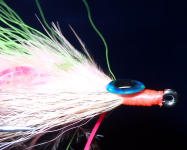
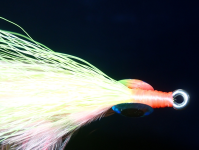
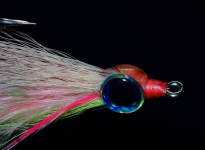
The Lefty’s Deceiver fly pattern or more appropriately the deceiver style can be tied with lots of variations for both freshwater and saltwater targets. The Dancing Deceiver as I call it incorporates two additional materials—marabou and silicon legs. The marabou inspiration comes from the marabou method used in the Gartside Soft-hackle Streamer while the silicon legs are a common component in many saltwater patterns. Their purpose is movement and contrast. Variegated, bi-colored silicon legs provide subtle movement and contrasts when the fly is wet. Marabou, especially barred marabou, also provides movement and contrasts when the fly is wet.
- Hook: Any 2X/3X long streamer hook
- Thread: UTC 140 White
- Tail: Bucktail (any color)
- Flash: Any slender flash such as Crystal Flash, Polarflash, Crystal Pearl Flash
- Body: Flat braid
- Silicone Legs: Any bi-colored, variegated legs
- Marabou: Fine or wide-barred marabou
- Wing: Bucktail (any color)
- Belly: Bucktail (any color)
- Eyes: 5-8mm dome eyes
Steps:
1. Create a thread base on the back half of the hook shank to the hook bend aligned with the hook barb. Leaving the front half of the hook shank bare helps maintain room for the middle section and bucktail.
2. Select a small clump of bucktail for the tail. Trim to desired length. The tail should extend 1 to 1.5 times the hook shank length. The tail is tied in at the middle and on top of the hook shank leaving the forward part of the hook shank bare.
3. Tie-in the desired number of flash fibers on top of the hook shank. The flash should extend to just short of the bucktail tail.
4. Tie-in and tightly wrap the rear half of the hook shank with flat braid. The braid helps keep the tail fibers and flash straight while protecting the wraps for both the bucktail and flash. Flat braid is fragile and to protect it from fraying caused by toothy fish, coat the braid body with head cement.
5. Select 3-4 strands of bicolored, variegated silicone legs. Fold in half and tie-in the ends just in front the braid body. The legs should be tied-in on top of the hook shank and form a loop over the tail. Cut the loop to create six or eight legs.
6. Tie-in the barred marabou immediately in front of the silicone legs and braid body. There are three configurations that can be used for the marabou. 1) Tie-in a flexible marabou feather by the stem and wrap it forward around the hook shank like hackle. Tie it off and fold back the tip of the feather. 2) Tie-in a single clump of marabou on top the hook shank. 3) Tie-in two clumps of marabou on top and bottom of the hook shank. This configuration allows you to use different color combinations of marabou if desired. When the marabou is tied-in and/or wrapped take a number of thread wraps back over the base of the marabou to help sweep it back over the body. Additionally, clean thread wraps over the marabou creates a clean, smooth base for the bucktail wing and belly. You should have at least ¼” – 3/8” of space at the front of the hook to securely tie-in the bucktail.
7. Take a slender clump of bucktail for the top wing and cut to desired length. Ideally, the bucktail wing should extend to or slightly beyond the bucktail tail. Trim the butt ends squarely flush and tie-in just behind the hook eye. Take a number of tight thread wraps over the bucktail back to the base of the marabou. At the base of the marabou, press firmly down on the bucktail to flatten and flare the fibers slightly down the sides of the fly.
8. Repeat the process for the belly wing and take enough thread wraps to completely cover the bucktail with a smooth head.
9. If you are using colored thread, tie-off with a whip finish or several double half hitches and proceed to step 10. If using white thread, tie-off with a whip finish or several double half hitches and before trimming the thread, you can color the head wraps with any color you desired using an alcohol marker or sharpie. Allow the color to dry a minute before cutting the thread.
10. Mounting the eyes. A rotary vise is of great benefit here for the four-step process of mounting the eyes and finishing the head. 1) Rotate the vise 90 degrees so that the side of the fly is facing up. Apply a small drop of UV resin at the junction of the thread wraps and the materials. Place the desired eye so that is covers the junction with ~ half the eye above the hook shank and half the eye over the material. Holding the eye in-place with your finger, quickly cure the UV resin. This tacks the eye in-place. Repeat for the other side of the head ensuring the eyes are aligned top and bottom, front and back. 2) Place a dollop of UV resin between the top of the eyes while holding the bucktail down. Cure the UV resin. Repeat for the bottom of the eyes. It is important to confine the UV resin as much as possible between the eyes to allow it to penetrate and not run while holding down the bucktail. 3) Apply a thin coat of UV resin over the remainder of the thread wraps while also covering the eyes with resin. Ensure no resin blocks the hook eye. Apply resin just beyond the rear of the eyes. The resin will run if too much is applied. Rotate the fly until the resin levels, then cures while continuing to rotate. 4) Once cured, apply a thin coat of head cement over the cured UV resin.