
SBS: Myakka Minnow
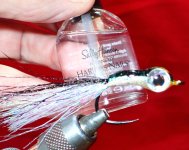
The Myakka Minnow is a simple, versatile baitfish imitation fly, originally tied by Steve Gibson for bass and panfish on Florida’s Myakka River, effective in both freshwater and saltwater.
Origin and Purpose
The Myakka Minnow was created by Steve Gibson in 2005 after a frustrating day on the Myakka River, Florida, when fish were keyed into tiny minnows and ignored other offerings. Gibson designed a fly, under an inch long, with a sinking profile and large eyes, to closely imitate the minnows that fish were actively feeding on. Since its creation, the pattern has been adapted for a wide range of species and waters, including cold-water streams and saltwater flats.
Color combinations, sizes and materials, especially tailing material can be tailored to the target species.
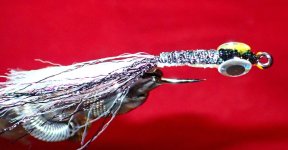
Saltwater Adaption of the Myakka Minnow
Recommended Tying Tools:
The Myakka Minnow is a simple, versatile baitfish imitation fly, originally tied by Steve Gibson for bass and panfish on Florida’s Myakka River, effective in both freshwater and saltwater.
Origin and Purpose
The Myakka Minnow was created by Steve Gibson in 2005 after a frustrating day on the Myakka River, Florida, when fish were keyed into tiny minnows and ignored other offerings. Gibson designed a fly, under an inch long, with a sinking profile and large eyes, to closely imitate the minnows that fish were actively feeding on. Since its creation, the pattern has been adapted for a wide range of species and waters, including cold-water streams and saltwater flats.
Color combinations, sizes and materials, especially tailing material can be tailored to the target species.
Saltwater Adaption of the Myakka Minnow
- Hook: Firehole 801P, 1/0
- Thread: Veevus 0.10 Mono
- Tail: Flash (Optional: Hackle, Marabou, Silicone, etc.)
- Body: Flat Braid
- Back: Dark Flash or Flat Braid
- Eyes: 3D eyes sized to hook size
- Coating: UV Resin finished with head cement
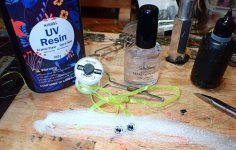
Recommended Tying Tools:
- Bobbin Hanger
- Rotary Vise
- Create a thread base with mono thread from the hook bend to just behind the hook eye leaving about 1/16” space behind the hook eye.
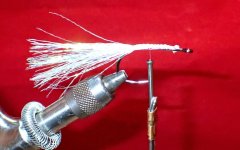
- Tie in the first clump of tailing flash just behind the hook eye creating a smooth base of flash along the hook shank. Repeat with additional flash or other tailing material. The smooth base along the hook shank helps create a smoother body when the braid is added.
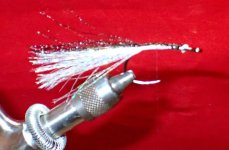
- Affix the flash or braid material used for the back at the bend of the hook trailing backwards.
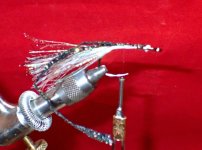
- Affix the body braid securely at the hook bend and bring the thread forward to the hook eye. Secure with two double half hitches and hang over a bobbin hanger.
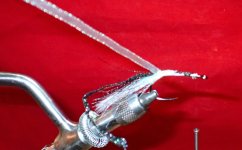
- With tight tension, wind the braid with the rotary vise forwards and backwards to create a minnow profile finishing off just behind the hook eye. While holding the braid tight, secure with thread wraps going back at least ¼” behind the hook eye.
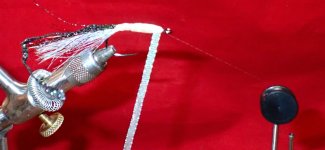
- With the thread just behind the hook eye, stretch the braid or flash used for the back forward to the hook eye and secure with a few tight thread wraps before folding it back to the hook bend. Secure with tight thread wraps from the hook eye back to the hook bend and then back to the hook eye and apply two double half hitches.
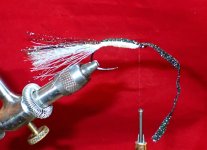
- IMPORTANT: Before trimming the thread, coat at least ¼” behind the hook eye with a thin coat of resin and cure. This prevents the thread from coming loose and causing the braid to loosen or unwind when the thread is trimmed. Also, if you intend to apply any markings with an alcohol marker the thin coat of resin keeps the markings from running and soaking into the braid.
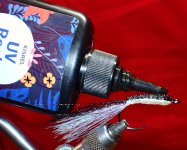
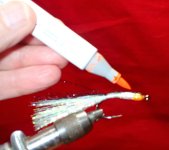
- To add the eyes, rotate the fly 90 degrees and place a small dollop of resin at the spot you want the eye to be. Put the eye in place and cure to tack the eye in position. Repeat with the other side of the fly.
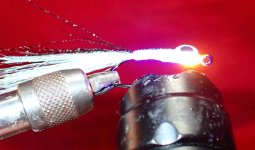
- UV resin tends to run if too much if added at once, especially in warm conditions. Begin the coating process by applying some resin between the eyes and cure. Do the top first, then the bottom. Then start applying a thin coat of resin around the body and finally continue coating the eyes by covering them with a thin coat of resin. IMPORTANT: If the resin show any signs of running, DO NOT CURE immediately. Use the rotary vise to rotate the fly which should begin leveling the resin. Once leveled, continue rotating and cure. ALSO IMPORTANT: Ensure that resin does not occupy the hook eye when curing. It is very difficult to remove once cured.
- Using your favorite head cement, coat the entire body of the fly with a thin coat of head cement.