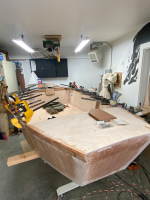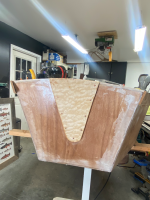
Port Ludlow Pram build underway!

Jameson Hawn

Steelhead
This post is really exciting for two reasons: 1) This is my first official post here on PNW Fly Fishing; and 2) I am now officially underway with my Port Ludlow Pram build. This build is my attempt to ward off the inevitable winter doldrum and jump-start spring fishing with a rowable work of art. I am joined in this endeavor by my friend, Jeff Dodd, who is also going step-by-step on his own pram across town. Between the two of us you might be all prammed out come winter, but we hope our posts can help others jumpstart into building something epic.

To summarize the past few months, Jeff and I have spent far too many hours pouring over the details of the plan set (from the Port Ludlow Fly Fishing Club), considered slight modifications (then reconsidered, then considered yet again), and in the end we purchased materials. The video below is Part One of my series on my Riverbend Woodworks YouTube channel, covering the Ludlow in comparison with the popular Spring Creek pram. The build fun begins in Episode 2, so stay tuned!

Port Ludlow Pram Build, Ep. 1
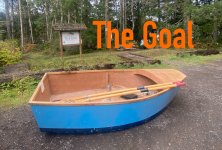
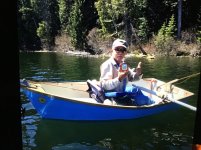
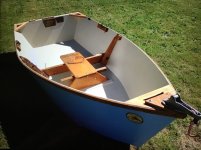
A Port Ludlow Pram at the Teal Lake parking area near Port Ludlow. This boat is a donor boat as an example for how to build my own.
 
Agree, enjoy the journey.

Fishing out of a boat you built yourself is very satisfying. Take your time and realize that if your experience is anything like mine that it may take longer than you thought it would, but it’s well worth the effort.
 
I missed the video somehow the first time around, same here... looking forward to the next onw!
 
I was wondering the same, it does beg the Q, how many prams does a man need? That said I have at least 10 rods extra to my needs, until I need them 😀

Dave
Dave!
Bring that pram of yours (& 3 of the rods) over to Port Townsend and let’s fish some open water! 😀
 
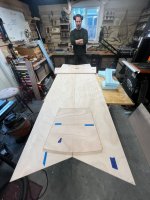
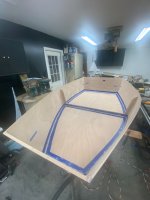
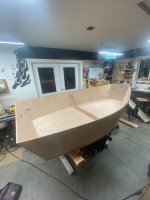
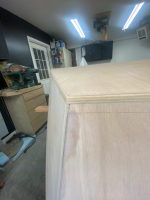
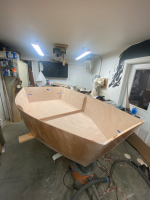
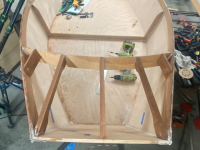
My crash course in boat building is well underway. The Port Ludlow pram is an interesting design because it’s never more than a full sheet of (not cheap) marine plywood in any direction. I have noticed a few little discrepancies with the plan set vs reality, but overall it’s pretty darn easy even in my small shop.

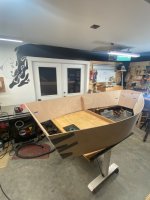
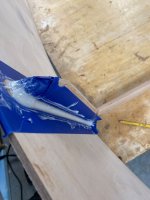
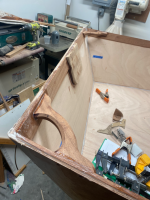
The pram only has one center-ish rib support with the overall construction relying heavily on thickened epoxy fillet. Naturally, I was a bit worried because to look at the fillet “weld” my mind pretty much thought it was like crafters ModPodge, but man was I wrong! I’ve chatted with a few former wooden boat school students here on the Olympic Peninsula and they swear the thickened West System epoxy fillets are basically as strong as the plywood they hold together.

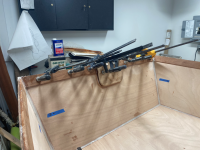
In an effort to make less of a mess, I actually followed the directions and used a boatload of blue tape to establish the edges for each inside corner. The fillet epoxy is gooped between the blue tape and a 1/2” radius tongue depressor was used to make it look smooth. You let the epoxy start to tack up before removing the tape…wait too long and you have a tough day of sanding ahead. Fun facts: Once the extra epoxy starts to “flash off” in your mixing cup be ready…it gets HOT! Naturally, if you have excess epoxy, don’t leave it in your shop unattended or throw it into a garbage can or it can combust. Just set it outside and let it harden and then dispose of it.

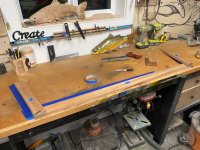
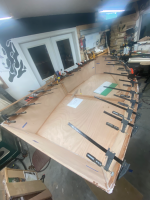
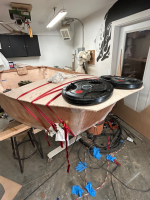
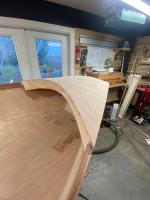
One of the sketchier things I had to navigate was routing the bottom 12mm piece of ply with a flush trim bit in my router. It was a glorious mess, and probably would have been smarter to have a friend assist, but in the end it worked out and got me ready for sanding the bottom flush with each side. The final step was to round over each edge. Rounding the edge makes for much stronger fiberglass corners.

That’s the latest update on the pram build. Next it’s on to fiberglassing and a ton of sanding!
 

Attachments

  • IMG_5574.jpeg
    IMG_5574.jpeg
    622.2 KB · Views: 77
  • IMG_9209.jpeg
    IMG_9209.jpeg
    505 KB · Views: 73
  • IMG_9227.jpeg
    IMG_9227.jpeg
    470.7 KB · Views: 73
  • IMG_9275.jpeg
    IMG_9275.jpeg
    469.2 KB · Views: 75
  • IMG_9181.jpeg
    IMG_9181.jpeg
    746.4 KB · Views: 79
  • IMG_9283.jpeg
    IMG_9283.jpeg
    451.6 KB · Views: 78
Looks great so far Jameson! Another fellow fish carver?
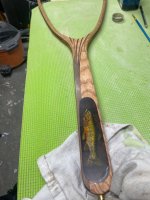
Indeed! I’ve been carving for about 15 years or so and have quite a few just hanging around my shop. I also do a fly fishing adventure series called “Catch 2 Carve” on my YouTube channel where I target a new species of fish with the fly rod and document the adventure, the fish, and carve a 1:1 replica. I also add carvings to my fishing net handles as well.
 

Attachments

  • IMG_9038.jpeg
    IMG_9038.jpeg
    653.3 KB · Views: 34
Last edited:
Indeed! I’ve been carving for about 15 years or so and have quite a few just hanging around my shop. I also do a fly fishing adventure series called “Catch 2 Carve” on my YouTube channel where I target a new species of fish with the fly rod and document the adventure, the fish, and carve a 1:1 replica. I also add carvings to my fishing net handles as well.
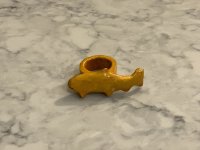
Awesome! Best I ever did was carving fish neckerchief slides when I was active with my son’s Boy Scout Troop and I was a counselor for the Fly-Fishing Merit Badge. Gave away a few when the badge was introduced late in my adult scouting career. Not the same quality as yours, but fun and a great way to pass the time during camping trips with the scouts. Nice boat BTW. I’ve thought about building one but definitively DON’T need another boat.

IMG_3235.jpeg
 
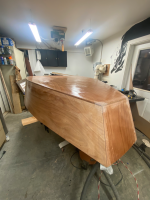
Time for a little update on the Port Ludlow Pram build. Since attaching the bottom, I moved on to a ton of sanding with 80-grit to ease all the edges for the fiberglass. Fiberglass for this boat is the primary strength member. I used a heavy weight 4-inch-wide material that laps over every corner. I used the West System epoxy with a fine roller to ensure the fiberglass was fully wetted out. With the extra epoxy I added a coat around the exterior and daaaang is that okume plywood gorgeous! The final step was a first try at fairing the edges of the fiberglass. This is basically taking the epoxy and thickening it until it's like peanut butter. With that consistency, you use a trowel to skim it on, much like sheetrock mud on a corner tape joint.

With the corners all stabilized, I moved on to the gunwales, which are made from solid sapele mahogany. The inner gunwale was up first and it's 1/4" x 2" and I added a little 45-degree routed edge to one side to ease it. I epoxied the crap out of this and moved on to the transom. The transom plate is a solid piece of sapele with some thinner pieces to accent. The inner gunwale needed to be in place to then tackle the bow deck...this is where the fun starts.

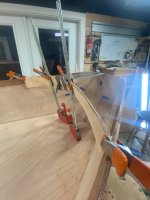
On the traditional Ludlow Pram, the bow "deck" is ~25.5" from the front of the bow to where it crosses the boat. That's a lot of real estate in a smaller boat, plus, it just didn't have a lot of excitement. I opted to use bendy board (1/8" ply material that can, as the name suggests, bend and flex and hold odd shapes when adhered together), and I laminated three layers of bendy board in an arch shape. Once dry, this arch was cut to size and placed using a mess of clamps, duct tape, scrap ply, and pretty much anything not bolted down. The result was a great fit! I then cut and fit a solid sapele sub structure for the "deck". This was a bit of overkill, structure wise, but it was for a good reason. rather than use more bendy board (as the plans call for), I opted for the marine grade 6mm ply I had extra of and bent/flex/cursed/strained it into place with clamps and ratchet straps. The result was a smoother surface that will better accept the veneer top I plane to place later on.

Other fun side quests involved designing some solid sapele handles of the back, plus a figure maple bow protection plate (to keep bow anchor from destroying the ply). Up next is two floatation pods, a seat box, and some other super cool details
 

Attachments

  • tempImageT5lCC5.png
    tempImageT5lCC5.png
    1.8 MB · Views: 53
  • tempImageDqZThz.png
    tempImageDqZThz.png
    1.9 MB · Views: 51
  • tempImageJTqgEg.png
    tempImageJTqgEg.png
    1.8 MB · Views: 52
  • tempImagevJ8gcK.png
    tempImagevJ8gcK.png
    1.9 MB · Views: 50
  • tempImagethc0NV.png
    tempImagethc0NV.png
    1.8 MB · Views: 50
  • tempImageUfmtp9.png
    tempImageUfmtp9.png
    1.9 MB · Views: 52
  • tempImageFuKC8s.png
    tempImageFuKC8s.png
    2 MB · Views: 53
  • tempImage4N67t1.png
    tempImage4N67t1.png
    2 MB · Views: 52
  • tempImageSwoHc9.png
    tempImageSwoHc9.png
    2.1 MB · Views: 51
  • tempImageX0d0HV.png
    tempImageX0d0HV.png
    1.9 MB · Views: 51
  • tempImageh242BJ.png
    tempImageh242BJ.png
    1.9 MB · Views: 52
  • tempImageaM7i2h.png
    tempImageaM7i2h.png
    1.9 MB · Views: 52
Last edited:
Back
Top