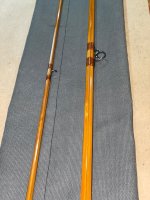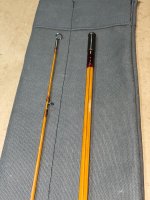
New Martha Marie on the bench

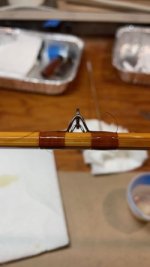
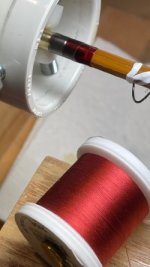
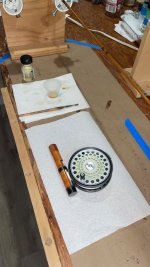
Here's another consideration for wrapping guides with silk thread. Once you coat it with varnish it will look a lot different. I usually try some test wraps under the reel seat area to double check my choices. The change can be dramatic to say the least. The darker images are after the varnish is applied. You can avoid this if you use a color preserver to stay closer to the dry shade of the color of the silk.silk1.jpgsilk2.jpgsilk3.jpg
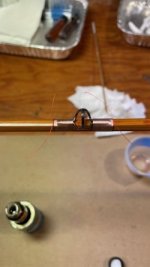
 
Here's another consideration for wrapping guides with silk thread. Once you coat it with varnish it will look a lot different. I usually try some test wraps under the reel seat area to double check my choices. The change can be dramatic to say the least. The darker images are after the varnish is applied. You can avoid this if you use a color preserver to stay closer to the dry shade of the color of the silk.View attachment 138046View attachment 138047View attachment 138048
Hey Mike - Do you use any walnut oil before varnish to wet the silks and do you heat the oil/varnish (I use a hot, post boil waterbath) - varnish goes on much more evenly, in a thin coat, with less chance of alligatoring. Also, I thin the first varnish coat (or 2) with turpentine.
 
I don't use walnut oil or thin my first coat of Helmsman Spar Var anymore (I used to). I had an issue once when I was thinning my varnish with artist turps by about 20%, I got shimmers in every transparent tan wrap. Really bummed me out as I had to re wrap the entire rod and try again. Well, I used a thinned varnish mix again and the shimmers were back. I bought a new can of HSV and re wrapped the rod again and went with straight HSV this time. No shimmers so that's what I'm doing now. The problem could have been related to thread tension, but I haven't tested the theory yet. I do warm my varnish a bit. I might try thinning my HSV for the next few coats to try to keep them from building up too much. But if your system works for you that's great, more than one way to bake a cake.
 
Another step closer to the finished rod today. I got the second coat of Spar Var on all the base and tip wraps. I finished making the hardware on the lathe for the Birdseye maple reel seat and got it "blued" and fitted. Next, I will be cutting the insert to proper length and mounting it on the base section. Then after that I'll need to flat sand the wraps with some 1500 wet or dry to remove the imperfections before the final coats of varnish. lather this week. Getting excited now ;)

reel seat.jpeg
 
Mike, I bet sanding the wraps before final coat is one of those little touches that makes for a perfectly made rod. I'm curious how many coats you will have before sanding, and do you worry about cutting down to the thread and causing fraying? (This sounds like a new thing I need to add to my own wraps work).
 
Beautiful work!
Another step closer to the finished rod today. I got the second coat of Spar Var on all the base and tip wraps. I finished making the hardware on the lathe for the Birdseye maple reel seat and got it "blued" and fitted. Next, I will be cutting the insert to proper length and mounting it on the base section. Then after that I'll need to flat sand the wraps with some 1500 wet or dry to remove the imperfections before the final coats of varnish. lather this week. Getting excited now ;)

View attachment 138262
 
Mike, I bet sanding the wraps before final coat is one of those little touches that makes for a perfectly made rod. I'm curious how many coats you will have before sanding, and do you worry about cutting down to the thread and causing fraying? (This sounds like a new thing I need to add to my own wraps work).
I normally have to hit a few nibs before the final coats of varnish. I asked Dave Dozer about his routine for the beautiful wraps he produces, and he mentioned sanding. My specific question was to keep the wraps "flat" on the shafts, my finish work tends to build up a bit more than I like. Dave said he sands the wraps with 1500 grit wet or dry, very lightly to remove any imperfections (dust, nibs etc.). I'm going to try this after three full strength coats of Spar Var. It will be a very light sanding using a rough planed strip of bamboo with the wet or dry glued to it. I hope I don't get to the thread ;)
 
Mike, curious about the varnishing. Do you use a dip tube, brush, or some other method to get a nice, smooth final coat?
 
Mike, curious about the varnishing. Do you use a dip tube, brush, or some other method to get a nice, smooth final coat?
I've come to like the ease of using Tru-Oil gunstock finish. I wipe on about a dozen coats then add the guides and wraps. In my drying box kept at about 85 degrees, it only takes about three hours for a coat to dry. You can easily get four coats on in a day if you start early enough. I apply it with the shafts hanging on a attached wire loop from the ceiling. I wet a few rifle cleaning patches and start at the top of the shaft and loosely wrap the patch around the shaft and slide it all the way down putting on a wet coat. Then one more wet coat standing on the opposite side of the hanging shaft. I don't rub the finish into the shafts like you would on a gun stock. It creates too much of a static charge attracting dust as I move the shafts to the drying box. The nice thing about Tru-Oil is if you get a nick or a ding in the rod it's easy to just touch it up plus you don't need any special space to do it.
 
I've come to like the ease of using Tru-Oil gunstock finish. I wipe on about a dozen coats then add the guides and wraps. In my drying box kept at about 85 degrees, it only takes about three hours for a coat to dry. You can easily get four coats on in a day if you start early enough. I apply it with the shafts hanging on an attached wire loop from the ceiling. I wet a few rifle cleaning patches and start at the top of the shaft and loosely wrap the patch around the shaft and slide it all the way down putting on a wet coat. Then one more wet coat standing on the opposite side of the hanging shaft. I don't rub the finish into the shafts like you would on a gun stock. It creates too much of a static charge attracting dust as I move the shafts to the drying box. The nice thing about Tru-Oil is if you get a nick or a ding in the rod it's easy to just touch it up plus you don't need any special space to do it.
Thank you. I appreciate the detailed reply!
 
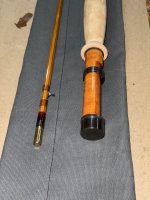
Well, the rod is pretty much finished now. I have some cosmetic touches and a couple more coats of varnish to add to the wraps, but bottom line is it can be fished as is. The rod weighs 4.06 oz, 7'6" and with my Hardy Princess mounted it balances right at the nose of the grip (y). I am VERY happy with the rod. You might notice the dark lines on the corners of the shafts, this is the result of using Resorcinol for the glue up. I am liking the look. So, this will be the final status report because the cosmetic touches will be minor and hard to see. I'm looking forward to casting this rod on my first outing of 2025, once it warms up a bit;). Thanks for tagging along.
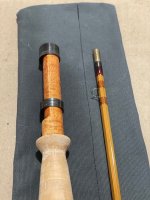
final 2.jpgfinal1.jpgfinal3.jpgfinal 4.jpg
 
Well, the rod is pretty much finished now. I have some cosmetic touches and a couple more coats of varnish to add to the wraps, but bottom line is it can be fished as is. The rod weighs 4.06 oz, 7'6" and with my Hardy Princess mounted it balances right at the nose of the grip (y). I am VERY happy with the rod. You might notice the dark lines on the corners of the shafts, this is the result of using Resorcinol for the glue up. I am liking the look. So, this will be the final status report because the cosmetic touches will be minor and hard to see. I'm looking forward to casting this rod on my first outing of 2025, once it warms up a bit;). Thanks for tagging along.
View attachment 138321View attachment 138322View attachment 138323View attachment 138324
Beautiful! A fun thread to follow!
 
Mike, wonderful looking rod! Question - I know that Bill Phillipson was famous, or infamous, for choosing resorcinol for his rods...besides doing its job as an adhesive, what other advantages does it provide over more commonly used rod glue? Does it have any effect (possibly) on rod action?
 
I think it might make the rod action a bit crisper, but I could not prove that, just my personal feelings. I have no documentation or testing documents to support that, but if memory serves me, I think I read something to that effect somewhere on the internet. I bought some NOS years back at the Corbett Lake gathering I was attending and just decided to give it a go. Pretty spooky the first time using it risking the hours of planing to taper not knowing if it would be a good choice or not or if it was past the use by date.

But bottom line is I like it, and the pin stripes look cool:cool:
 
Nice job Mike I’m just learning how to build reel seat components and your work is very clean. I may try resorcinol on one of my future builds as I have been using titebond 3 and the working time is sporty and there is no time for error. Do you turn your ferrules also as I change to building single handers I may pick you brain for pointers if you are ok with that.
 
I think you will like the Resorcinol Dennis; it has a decent work time and pot life. Yes, I do make my reel seat inserts, cap, ring and grip bushing and ferrules. No problem chatting about the ferrules or dropping in again for a visit. You need to invest a bit when you get started, but if you plan to make more rods it will pay off.
 
Last edited:
Back
Top