Cowlitz Bottomfeeder
Life of the Party
The current aftermarket strap/tube arrangement has entirely too much flex to be useful.
Thanks for the reply. I think the issue is the amount of flex in the system, not the tightness of the strap. But it’s worth a try.Try mounting it on pontoon with less air pressure strapped tight, then inflate pontoon completely.
Thanks. I sent him a pm.You might ask Rex if he has a possible solution @Starman77
I saw a posting about a new one he has.

This is exactly the approach I take with the Fishin Buddy 120, the Humminbird strap-on mount and my Fish Cat Scout. It's works well for me although I have shortened up the transducer leg on the Fishin Buddy.Try mounting it on pontoon with less air pressure strapped tight, then inflate pontoon completely.


Thanks! That looks like a really good option.This is exactly the approach I take with the Fishin Buddy 120, the Humminbird strap-on mount and my Fish Cat Scout. It's works well for me although I have shortened up the transducer leg on the Fishin Buddy.
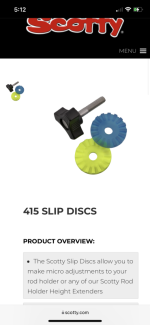
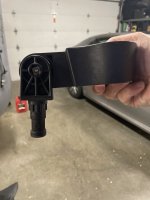
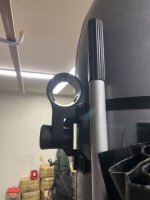
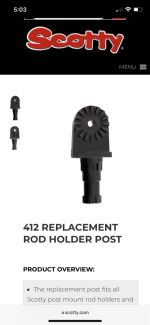
It is possible to use the Humminbird hard mount and a Scotty rail mount without any modification to Humminbird mount. The plastic "spokes" inside the Humminbird hard mount mesh with "gear" pattern on the Scotty 412 rod holder post. The Scotty rod holder post fits into any of the Scotty rail mounts. I used this system on an previous framed Fish Cat Streamer XL that I had. It was a very solid and inexpensive mount with no modification required. I think I got the original inspiration from a kayaking site.
Ken
View attachment 11089
View attachment 11090
View attachment 11091
View attachment 11092


Is the holder and strap available anywhere? The one that I have is not from Hummingbird and doesn’t fit the unit properly. I’ve almost lost it a couple of times.By the way, the inspiration for shortening the shaft of the Fishing Buddy came from Iveoflone and his Mickey Rooney model Fishin Buddy. Mine has been going stronger since 2018.
View attachment 11190
View attachment 11191
KenI personally haven't seen any offered for sale for 3 or 4 years. My only suggestion would be to keep an eye on EBay or local Buy & Sells sites. When I bought my Fishin Buddy, I remember seeing comments on a couple of different forums recommending the Humminbird one because of the snug fit. The other alternative at the time was one from Cabela's that was advertised as being for the Fishin Buddy but a lot of guys weren't happy with the fit of the Cabela's one.
Good luck
Ken
Flyrig,Ken
I’m interested in the process to shorten the shaft of a Fishing Buddy. Can you share how it’s done? Looks like a great setup.
Thanks