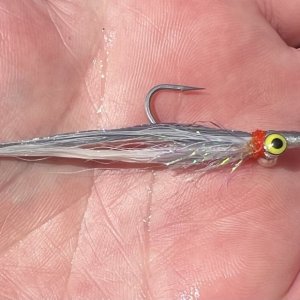
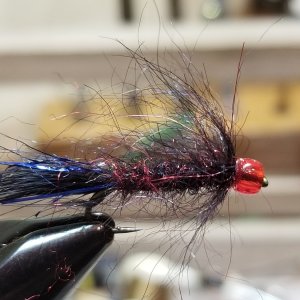
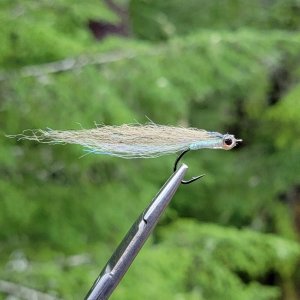
These have proven very useful for tying squid patterns, and can also be used for baitfish as a means of durably attaching eyes, adding color, and flash materials.
MATERIALS: UV resin (Solarez Thin here), rubbing alcohol, eyes of choice (FTD 12mm in silver ), and translucent craft ribbon (no idea brand/color used here but this is close: https://craftwarehouse.com/shop/ribbon-silver-wired-edge-sheer-1-5-inch/
TOOLS: UV light source (Mr. Sun used here), bodkin, hemostats, scissors, nitrile gloves, a smooth plastic surface, and markers (optional)
METHOD (in a nutshell): Stick eyes to ribbon, saturate and wipe smooth with UV resin, cure, and trim.
STEP 1: Cut a length of craft ribbon, lay on a smooth plastic surface and place eyes as desired. Here I want about 2'' of tab to work with to put the eyes near center of squid body. Just used the same parts box eyes are stored in:

STEP 2: Apply enough resin to cover the eyes, and with enough to secure the edges. Apply a few drops on the ribbon on the end you want to attach to the hook. Here I just used a bodkin to wipe the resin (to the left) about 2". Note: You'll want the match the eyes in each pair so they overlap closely when folded lengthwise (see STEP 5):

STEP 3: Cure resin. I gave these about 3 minutes right side up in the sun, then peeled the whole thing off, flipped it to cure the backside:


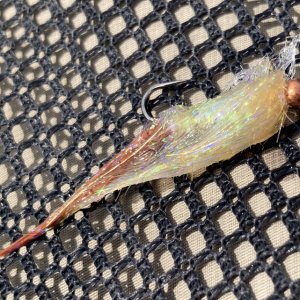
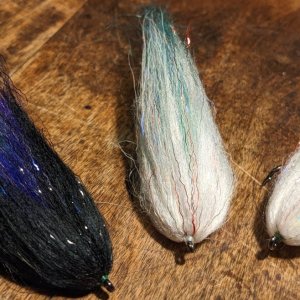
This is what the pre-trimmed product should look like:

STEP 4: Cut the eye-pairs to length:

STEP 5: Separate and trim the eyes. Start by folding each eye-pair lengthwise. The edges of the ribbon should match with the eyes closely aligned. Then clamp with hemostats roughly a half inch from the eyes to hold the alignment for trimming:


STEP 6: Trim and separate the eye tabs. With the fold secured, trim the back radius of both eye tabs, leaving 2mm or so outside the eyes. Trim forward to the hemostats with a slight taper towards center:

STEP 7: Finish trimming out the tabs. Pinch the eyes together to hold the alignment while re-clamping the hemostats near the base of the tabs (hook attachment point). Continue trimming with the slight taper towards center:


STEP 8: Finish trimming. Release the hemostats and finish trimming. Eye tabs almost ready to use:

Color and shape modifications next.
MATERIALS: UV resin (Solarez Thin here), rubbing alcohol, eyes of choice (FTD 12mm in silver ), and translucent craft ribbon (no idea brand/color used here but this is close: https://craftwarehouse.com/shop/ribbon-silver-wired-edge-sheer-1-5-inch/
TOOLS: UV light source (Mr. Sun used here), bodkin, hemostats, scissors, nitrile gloves, a smooth plastic surface, and markers (optional)
METHOD (in a nutshell): Stick eyes to ribbon, saturate and wipe smooth with UV resin, cure, and trim.
STEP 1: Cut a length of craft ribbon, lay on a smooth plastic surface and place eyes as desired. Here I want about 2'' of tab to work with to put the eyes near center of squid body. Just used the same parts box eyes are stored in:
STEP 2: Apply enough resin to cover the eyes, and with enough to secure the edges. Apply a few drops on the ribbon on the end you want to attach to the hook. Here I just used a bodkin to wipe the resin (to the left) about 2". Note: You'll want the match the eyes in each pair so they overlap closely when folded lengthwise (see STEP 5):
STEP 3: Cure resin. I gave these about 3 minutes right side up in the sun, then peeled the whole thing off, flipped it to cure the backside:
This is what the pre-trimmed product should look like:
STEP 4: Cut the eye-pairs to length:
STEP 5: Separate and trim the eyes. Start by folding each eye-pair lengthwise. The edges of the ribbon should match with the eyes closely aligned. Then clamp with hemostats roughly a half inch from the eyes to hold the alignment for trimming:
STEP 6: Trim and separate the eye tabs. With the fold secured, trim the back radius of both eye tabs, leaving 2mm or so outside the eyes. Trim forward to the hemostats with a slight taper towards center:
STEP 7: Finish trimming out the tabs. Pinch the eyes together to hold the alignment while re-clamping the hemostats near the base of the tabs (hook attachment point). Continue trimming with the slight taper towards center:
STEP 8: Finish trimming. Release the hemostats and finish trimming. Eye tabs almost ready to use:
Color and shape modifications next.
Last edited: