Bread Thread

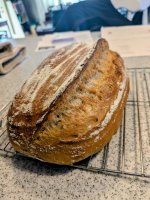
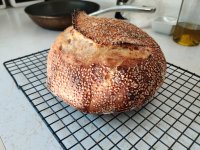
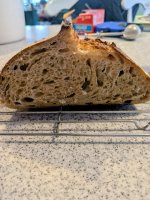
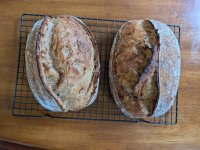
Slowly (very) starting to appreciate that the dough tells you when it is time for the next step. Beginning to get a sorta decent ear but still can't get Gary's monstrous bloom to occur. A sourdough rye. Haven't had to throw away any yet although one is being used as a door stop. On to the next one and can't wait..
0d4c8159-8b15-4c55-afd3-e9fb743fe4c9~1.jpg
 
What size banneton are you using for these? If it's the same size batard basket that I use your oven spring is massive.
My loaves are 400 grams of flour (~800 grams total weight) and the banneton is 10 inches long x 5 inches wide at the opening and and 3.5 inches deep.
 
  • Like
Reactions: Zak
Slowly (very) starting to appreciate that the dough tells you when it is time for the next step. Beginning to get a sorta decent ear but still can't get Gary's monstrous bloom to occur. A sourdough rye. Haven't had to throw away any yet although one is being used as a door stop. On to the next one and can't wait..
View attachment 150538
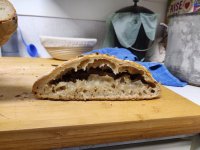
Good looking loaf! What do the guts look like?

When I started I knew the dough would tell me when it was ready for each stage, I just didn't know how to speak it's language and didn't have an interpreter or teacher so it took me a lot of trial and error before I could pick up the nuance.
This was my 3rd loaf...
IMG_20200422_200425.jpgIMG_20200422_193447.jpg
And somewhere around loaf 10
IMG_20200509_100314.jpgIMG_20200509_085252.jpg
 
Good looking loaf! What do the guts look like?

When I started I knew the dough would tell me when it was ready for each stage, I just didn't know how to speak it's language and didn't have an interpreter or teacher so it took me a lot of trial and error before I could pick up the nuance.
This was my 3rd loaf...
View attachment 150540View attachment 150541
And somewhere around loaf 10
View attachment 150542View attachment 150543
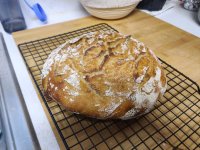
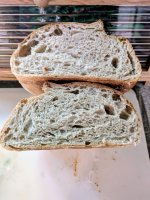
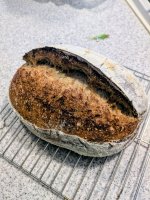
I think this about loaf 7 or 8 for me. The prior two I thought I had let the bulk ferment go too long. The dough was very tough to deal with and when finally shaped barely fit in the banneton. I believe I over corrected with this one and next time will let it go a little longer. Just had a slice and it is mighty tasty.
80b0d180-eab5-4342-a755-b1661cac080f~1.jpg
 
I think this about loaf 7 or 8 for me. The prior two I thought I had let the bulk ferment go too long. The dough was very tough to deal with and when finally shaped barely fit in the banneton. I believe I over corrected with this one and next time will let it go a little longer. Just had a slice and it is mighty tasty.
View attachment 150552
💯 Would eat. Great job!
 
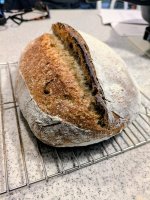
Due to the most generous coaching of our resident bread guru I now am starting to have enough knowledge to read what is happening and try to make an adjustment to modify the end result. And I found out that I should be using a higher protein content bread flour to help with the expansion and bloom. It arrives today and I can't wait to try it. Anyway this is this mornings effort a sourdough rye. Best ear yet. Getting closer.
f0c9e482-a1b9-433f-ab41-8d911b418dc3~1.jpg
 
Due to the most generous coaching of our resident bread guru I now am starting to have enough knowledge to read what is happening and try to make an adjustment to modify the end result. And I found out that I should be using a higher protein content bread flour to help with the expansion and bloom. It arrives today and I can't wait to try it. Anyway this is this mornings effort a sourdough rye. Best ear yet. Getting closer.
View attachment 151296
Yooo! That looks amazing
 
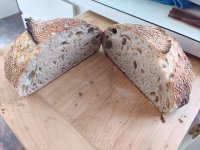
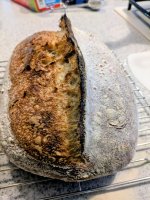
3 or 4 weeks ago I had no idea that there are different types of white flour and last week I had to rearrange the pantry to make room for essentials I never knew I really needed. Amazing the stuff you can learn all because you happen to like to fish with a fly. Received my Glacier Peak yesterday and the first effort is one I can definitely live with. Thanks, Gary for the guidance and telling me which rock to stand on.
b3480040-9c65-48d4-a157-2a66a0d9a707~1.jpg
 
3 or 4 weeks ago I had no idea that there are different types of white flour and last week I had to rearrange the pantry to make room for essentials I never knew I really needed. Amazing the stuff you can learn all because you happen to like to fish with a fly. Received my Glacier Peak yesterday and the first effort is one I can definitely live with. Thanks, Gary for the guidance and telling me which rock to stand on.
View attachment 151546
Don't tease me, let me see the crumb!
 
I've been thinking about doing this for a bit, but just hadn't. With the nerdy bread talk @albula and I have been having I figured I might as well do it now. Below is a fairly in depth explanation of my process for making sourdough, including photos and timing. I've landed on this method because it suits my schedule most weekends. All bread flour is Cairnspring Glacier Peak. All rest/proofing steps happen at room temp, which is 65-68 degrees in my kitchen most of the year.

9 pm Friday:
Take my starter out of the fridge, remove all but ~15 g of the contents. I save the discard in another container and use it to make savory chive pancakes.
Add 80 g flour (70:30 bread flour:dark rye)
Add 85 g water-this particular rye is THIRSTY
Place on my counter at ~65° until morning

8 am Saturday:
Measure out dough components
560 g bread flour
240 g whole grain, emmer in this case
625 g water at ~80°
18 g salt
6 g diastatic malt

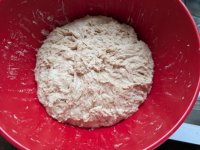
Mix the dry components, add the water, add 160 grams starter, which is right at peak in this timing for me. Using a Danish dough whisk, combine until no dry flour remains. Cover and set aside.
PXL_20250426_154333740.jpg
8:05: to my pint mason jar that holds my starter
Add 50 g flour, again 70:30
Add 53 g water
Mix with a chopstick, cover set on the counter

8:20
First set of stretch and folds. I'm pretty aggressive with this one. With wet hands, grab one side, lift up and fold over. Rotate the bowl 60 degrees and lift and fold. Keep rotating until back to the original position. Grab the original side, lift up and fold to the middle. Rotate 180 degrees and repeat. Rotate 90 degrees and repeat, rotate 180 degrees and repeat. Cover and set aside. If at any point the dough starts sticking to my hands, I whet them again.

8:50
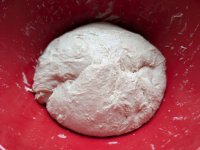
2nd set of stretch and folds. Still aggressive, I'm not worried about knocking air out of the dough this early. Grab one side, lift up and fold to the middle. Rotate 180 degrees and repeat. Rotate 90 degrees and repeat, rotate 180 degrees and repeat. Cover and set aside.
PXL_20250426_161257837.jpg

9:20
3rd set of stretch and folds, more gently now l. Grab one side, lift up and fold to the middle. Rotate 180 degrees and repeat. Rotate 90 degrees and repeat, rotate 180 degrees and repeat. Cover and set aside.

10:00
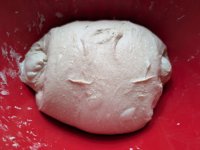
Coil folds. Whet hands and slide them under sough from both sides. Gently lift up until the side furthest from me separates from the bowl and tuck it under the dough ball. Set the dough down, rotate the bowl 180 degrees and repeat to lift the far side (completely detached now) and tuck under. Rotate the bowl 90 degrees and repeat the above. Cover and set aside.

10:05
Burp my starter jar, seal tightly and put in the fridge until next week. At this point my starter will have started to show bubbles and increased in volume ~30-40%. Just long enough to get a round of yeast cell division in, they don't like to divide in the cold, but will still ferment slowly.

10:30
1 more set of coil folds. Set aside until bulk ferment is done. I typically go to the grocery store, workout, and/or do yardwork/chores during this time.
PXL_20250426_181531680.jpg
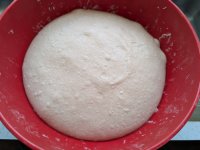
4:30: preshape
This amount of time is probably a little longer than average for me, but varies. It could be as early as 3, but it's also been as late as 7. I stopped trying to control it now that I can eyeball it's progress pretty well. I can tell when it is done by volume and jiggle.
PXL_20250427_000340346.jpg
Jiggle video
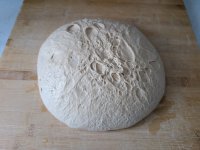
Whet hands and a rubber scrapper, loosen the dough from the sides of the bowl with the rubber scraper then invert onto a work surface until the dough falls out.
PXL_20250427_001356974.jpg
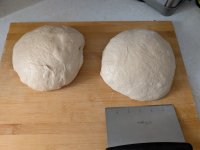
With a wet bench scraper, divide into 2 roughly even parts and do an envelope fold to each half of the dough. Scrape up, invert, and do a couple quick rounding pulls.
PXL_20250427_001539018.jpg
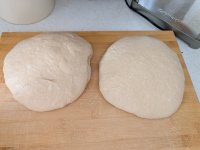
Let rest uncovered.

4:35
Dust bannetons with a 50:50 mix of AP flour and rice flour, set aside

5:00: Shape, my technique is a little different from most you'll find online but it works for me.
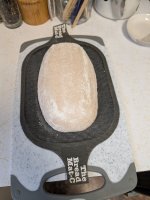
PXL_20250427_004711697.jpg
Dust both dough balls with AP flour
Scrape up and invert one dough ball
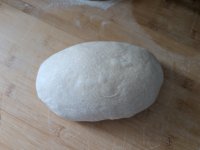
Gently stretch into a trapezoid about 10 inches tall, 10 inches wide on the far side, 8 inches wide on the near side. Fold the right side to the middle asymmetrically, overlapping more at the bottom than the top, fold the left side to the middle, making a new trapezoid that is 8 inches wide at the far side and sticky, 4 inches wide at the close end and floured. Starting at the bottom, gently stretch and roll up to the top, tucking the overhanging ends under the dough. A couple tightening pulls later and it's ready for the banneton.
PXL_20250427_004909153.jpg
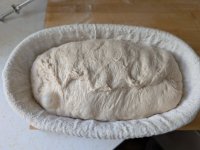
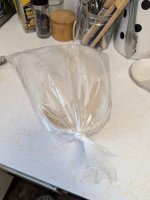
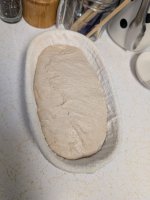
Drop in the banneton and stitch the seam tight, dust with AP:rice flour, bag, and put in the fridge. Repeat for the 2nd loaf.
PXL_20250427_004950330.jpg
PXL_20250427_160943662.jpg
7:00 am Sunday
Toss the challenger bread pan in the oven and preheat for an hour at 465.

8:00 am
Pull a loaf out of the fridge and invert onto a silicone mat
PXL_20250427_161031117.jpgPXL_20250427_161113412.jpg
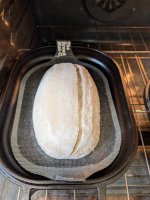
Make one long score down the dough slightly off-center with the blad tipped at a 45 degree angle to the surface
PXL_20250427_161209118.jpg
8:05
Pop into the pan and put the lid on. Bake 21 minutes. .

8:25
Take the 2nd loaf out of the fridge

8:26
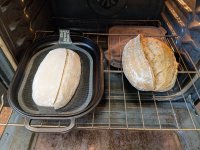
Remove lid and slide the loaf onto a bare oven rack. Slide a cold cast iron griddle onto the lower over rack beneath the loaf

8:27
Turn 2nd loaf out onto silicone mat, score and put in the challenger
PXL_20250427_163528419.jpg
8:41-8:43 depending on color
Remove loaf 1 from oven, put on wire rack

8:48
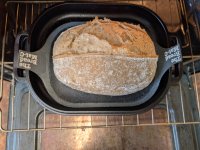
Take lid off challenger and invert lid onto the oven rack. Slide base of challenger onto the inverted lid
PXL_20250427_165835786.jpg
9:04-9:07 depending on color
Remove 2nd loaf from oven and place on wire rack

These 2 were gifts to friends so I don't have a pic of the guts.
PXL_20250427_171700679.jpg

I really enjoy making sourdough and love thinking/talking about it so feel free to ask any questions.

 
I've been thinking about doing this for a bit, but just hadn't. With the nerdy bread talk @albula and I have been having I figured I might as well do it now. Below is a fairly in depth explanation of my process for making sourdough, including photos and timing. I've landed on this method because it suits my schedule most weekends. All bread flour is Cairnspring Glacier Peak. All rest/proofing steps happen at room temp, which is 65-68 degrees in my kitchen most of the year.

9 pm Friday:
Take my starter out of the fridge, remove all but ~15 g of the contents. I save the discard in another container and use it to make savory chive pancakes.
Add 80 g flour (70:30 bread flour:dark rye)
Add 85 g water-this particular rye is THIRSTY
Place on my counter at ~65° until morning

8 am Saturday:
Measure out dough components
560 g bread flour
240 g whole grain, emmer in this case
625 g water at ~80°
18 g salt
6 g diastatic malt

Mix the dry components, add the water, add 160 grams starter, which is right at peak in this timing for me. Using a Danish dough whisk, combine until no dry flour remains. Cover and set aside.
View attachment 151602
8:05: to my pint mason jar that holds my starter
Add 50 g flour, again 70:30
Add 53 g water
Mix with a chopstick, cover set on the counter

8:20
First set of stretch and folds. I'm pretty aggressive with this one. With wet hands, grab one side, lift up and fold over. Rotate the bowl 60 degrees and lift and fold. Keep rotating until back to the original position. Grab the original side, lift up and fold to the middle. Rotate 180 degrees and repeat. Rotate 90 degrees and repeat, rotate 180 degrees and repeat. Cover and set aside. If at any point the dough starts sticking to my hands, I whet them again.

8:50
2nd set of stretch and folds. Still aggressive, I'm not worried about knocking air out of the dough this early. Grab one side, lift up and fold to the middle. Rotate 180 degrees and repeat. Rotate 90 degrees and repeat, rotate 180 degrees and repeat. Cover and set aside.
View attachment 151603

9:20
3rd set of stretch and folds, more gently now l. Grab one side, lift up and fold to the middle. Rotate 180 degrees and repeat. Rotate 90 degrees and repeat, rotate 180 degrees and repeat. Cover and set aside.

10:00
Coil folds. Whet hands and slide them under sough from both sides. Gently lift up until the side furthest from me separates from the bowl and tuck it under the dough ball. Set the dough down, rotate the bowl 180 degrees and repeat to lift the far side (completely detached now) and tuck under. Rotate the bowl 90 degrees and repeat the above. Cover and set aside.

10:05
Burp my starter jar, seal tightly and put in the fridge until next week. At this point my starter will have started to show bubbles and increased in volume ~30-40%. Just long enough to get a round of yeast cell division in, they don't like to divide in the cold, but will still ferment slowly.

10:30
1 more set of coil folds. Set aside until bulk ferment is done. I typically go to the grocery store, workout, and/or do yardwork/chores during this time.
View attachment 151604
4:30: preshape
This amount of time is probably a little longer than average for me, but varies. It could be as early as 3, but it's also been as late as 7. I stopped trying to control it now that I can eyeball it's progress pretty well. I can tell when it is done by volume and jiggle.
View attachment 151605
Jiggle video
Whet hands and a rubber scrapper, loosen the dough from the sides of the bowl with the rubber scraper then invert onto a work surface until the dough falls out.
View attachment 151606
With a wet bench scraper, divide into 2 roughly even parts and do an envelope fold to each half of the dough. Scrape up, invert, and do a couple quick rounding pulls.
View attachment 151607
Let rest uncovered.

4:35
Dust bannetons with a 50:50 mix of AP flour and rice flour, set aside

5:00: Shape, my technique is a little different from most you'll find online but it works for me.
View attachment 151608
Dust both dough balls with AP flour
Scrape up and invert one dough ball
Gently stretch into a trapezoid about 10 inches tall, 10 inches wide on the far side, 8 inches wide on the near side. Fold the right side to the middle asymmetrically, overlapping more at the bottom than the top, fold the left side to the middle, making a new trapezoid that is 8 inches wide at the far side and sticky, 4 inches wide at the close end and floured. Starting at the bottom, gently stretch and roll up to the top, tucking the overhanging ends under the dough. A couple tightening pulls later and it's ready for the banneton.
View attachment 151609
Drop in the banneton and stitch the seam tight, dust with AP:rice flour, bag, and put in the fridge. Repeat for the 2nd loaf.
View attachment 151610
View attachment 151611
7:00 am Sunday
Toss the challenger bread pan in the oven and preheat for an hour at 465.

8:00 am
Pull a loaf out of the fridge and invert onto a silicone mat
View attachment 151612View attachment 151613
Make one long score down the dough slightly off-center with the blad tipped at a 45 degree angle to the surface
View attachment 151614
8:05
Pop into the pan and put the lid on. Bake 21 minutes. .

8:25
Take the 2nd loaf out of the fridge

8:26
Remove lid and slide the loaf onto a bare oven rack. Slide a cold cast iron griddle onto the lower over rack beneath the loaf

8:27
Turn 2nd loaf out onto silicone mat, score and put in the challenger
View attachment 151615
8:41-8:43 depending on color
Remove loaf 1 from oven, put on wire rack

8:48
Take lid off challenger and invert lid onto the oven rack. Slide base of challenger onto the inverted lid
View attachment 151616
9:04-9:07 depending on color
Remove 2nd loaf from oven and place on wire rack

These 2 were gifts to friends so I don't have a pic of the guts.
View attachment 151617

I really enjoy making sourdough and love thinking/talking about it so feel free to ask any questions.
Thank you for this!
 
Thanks coach. Cut back on the bulk ferment and after a night in the fridge it was by far the smallest dough to come out of the shaping basket. I had my doubts. Apparently, however, it got the job done in the oven. 80-20 sourdough rye and the best ear and oven spring to date. It amazes how little tweaks can affect the final outcome. Guess that is why it's actually fun.
eaddfca5-8e5b-4d79-8fe5-439b8703c313~1.jpg
 
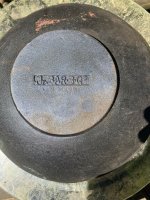
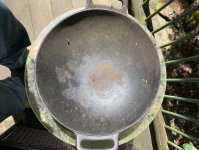
I know this is a bread thread but my dam Apple has updated and I’m lost so please be understanding. I just picked up a cast iron wok at a garage sale and need to know how to clean out the rust, I know some of you out there in fly fishing world can help me. I know this is not worth much but at $10. How can I miss it would be a good weight at the bottom of my crab trap if nothing else😍
 

Attachments

  • IMG_5569.jpeg
    IMG_5569.jpeg
    1.4 MB · Views: 4
  • IMG_5572.jpeg
    IMG_5572.jpeg
    1.1 MB · Views: 4
  • Like
Reactions: Zak
I know this is a bread thread but my dam Apple has updated and I’m lost so please be understanding. I just picked up a cast iron wok at a garage sale and need to know how to clean out the rust, I know some of you out there in fly fishing world can help me. I know this is not worth much but at $10. How can I miss it would be a good weight at the bottom of my crab trap if nothing else😍
I used a gritty flap disk wheel (maybe it was just a gritty wheel without the flaps, I can't remember) on my power drill to smooth out the pebbly surface of my cast iron Lodge wok. It would make short work of surface rust.
 
Last edited:
I used a gritty flap disk wheel (maybe it was just a gritty wheel without the flaps, I can't remember) on my power drill to smooth out the pebbly surface of my cast iron Lodge wok. It would make short work of surface rust.
Thanks I Wii try that. I read some where to never/never use a wire brush to remove rust, on a cast iron pan/pot. This wok is as bad as a Lodge pan as far as ruff surface goes.
 
  • Like
Reactions: Zak
Thanks I Wii try that. I read some where to never/never use a wire brush to remove rust, on a cast iron pan/pot. This wok is as bad as a Lodge pan as far as ruff surface goes.
I think you could use a wire brush, too. You are going to remove the rust together with any existing seasoning, smooth the surface, and reseason it, so no worries about saving the existing seasoning.
 
Back
Top